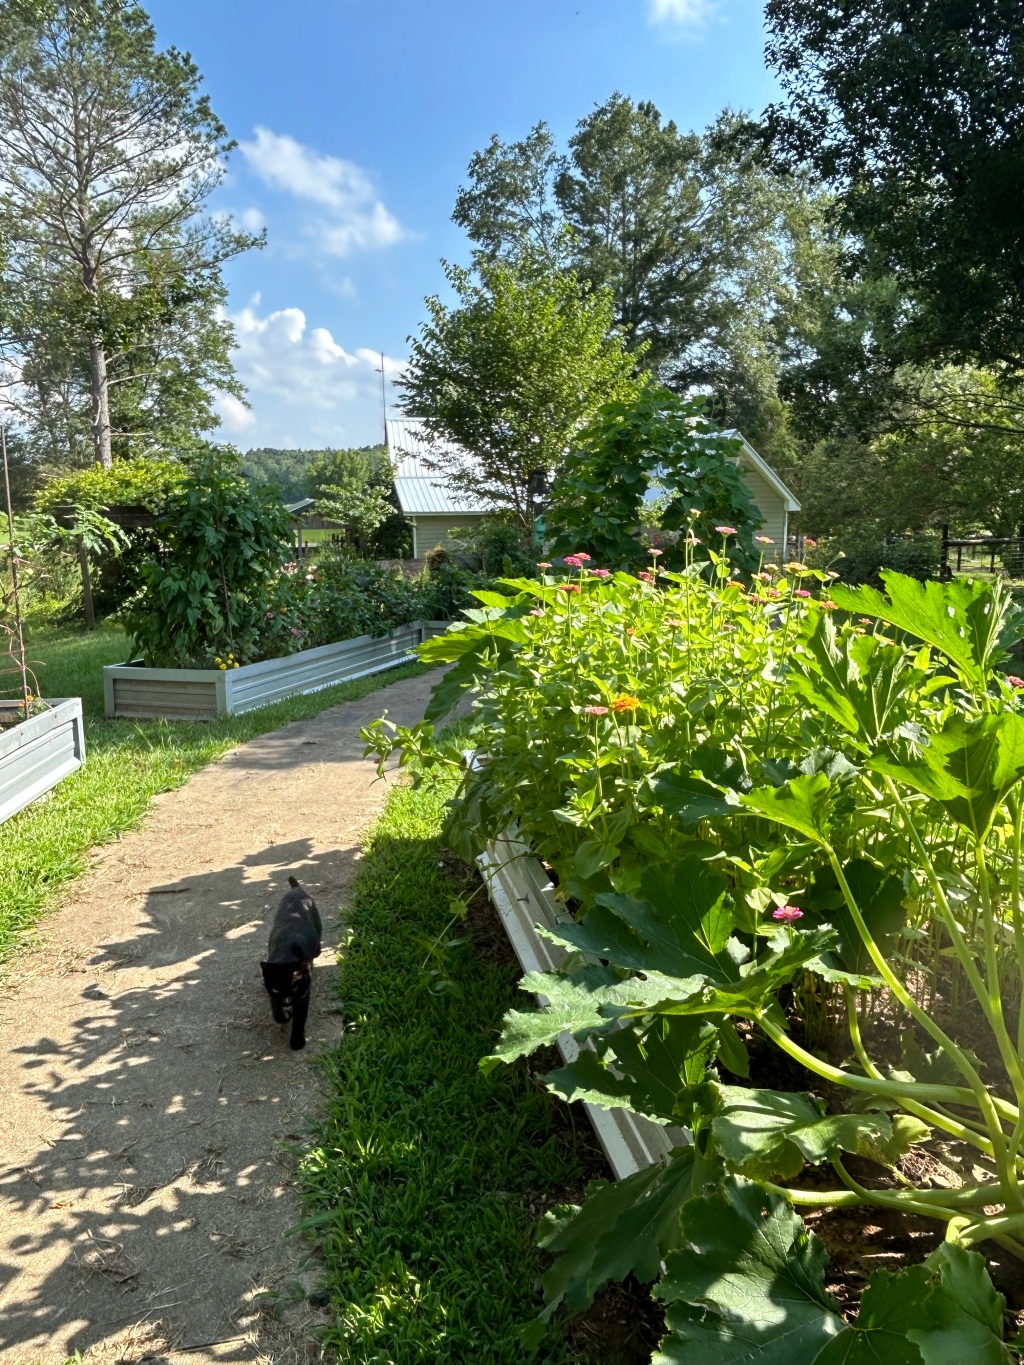
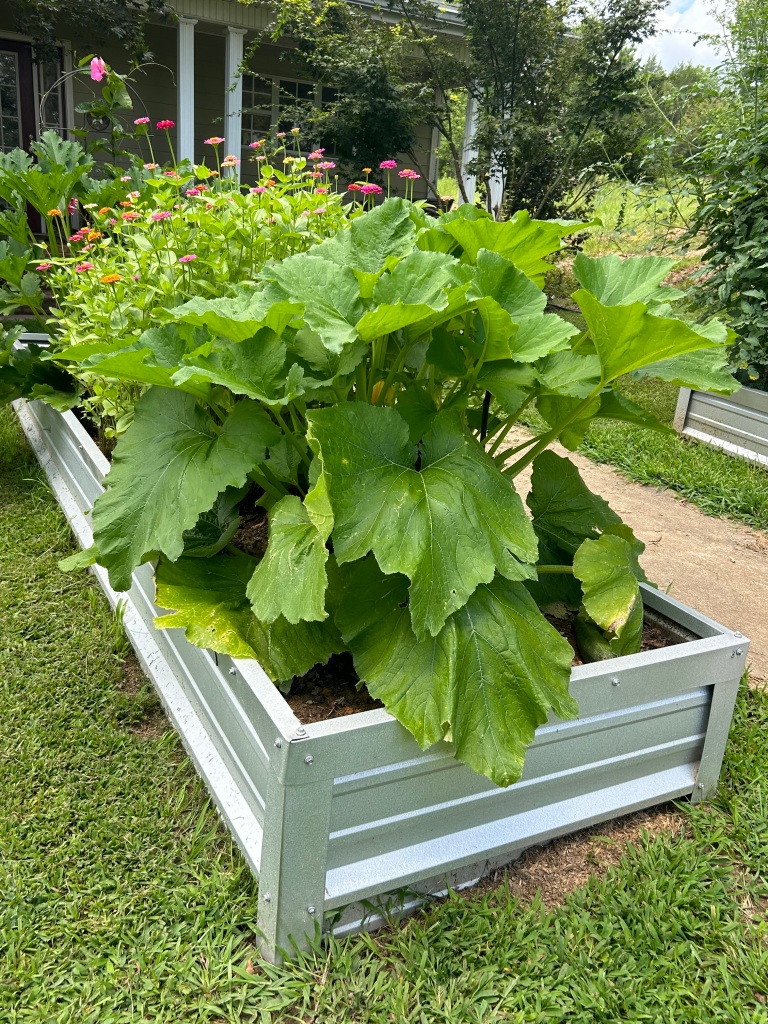
This is our first year to plant in raised beds. My husband helped me construct six raised beds 12 feet long, 3 feet wide, and 18 inches high. We used metal roofing and trim for metal roofing. No wood to rot. They are put together will sheet metal screws.
You can check out that post here. It has pictures, how to videos, a material list, cost, etc.
A lot of people warned me that when the weather got really HOT, the plants would bake in these metal beds. I was not too worried, because I have had one raised bed for several years that I made from a round, galvanized cattle tank. The plants in it did fine.
It is July here in Mississippi. Last week we had several days in a row where the temperature soared to over 100 degrees. Real temperature–not heat factor.
I was diligent to water every day unless we got a good shower. As soon as the soil in the raised bed started to look dry, I put the water to it. I did NOT wait until late afternoon as many people will tell you to do. If it was 12 noon, and my soil looked dry–I watered. I did NOT want my plants to even start to look stressed.
Having said that, I watered with a hose and made sure to get water only on the soil, avoiding the foliage of the plants. I had planned to install a self-watering system, but the summer got away from me, and I am using a water hose. Got to leave some part of the project for next year. Right? Would be a crying shame to actually finish a project the same year I started it!
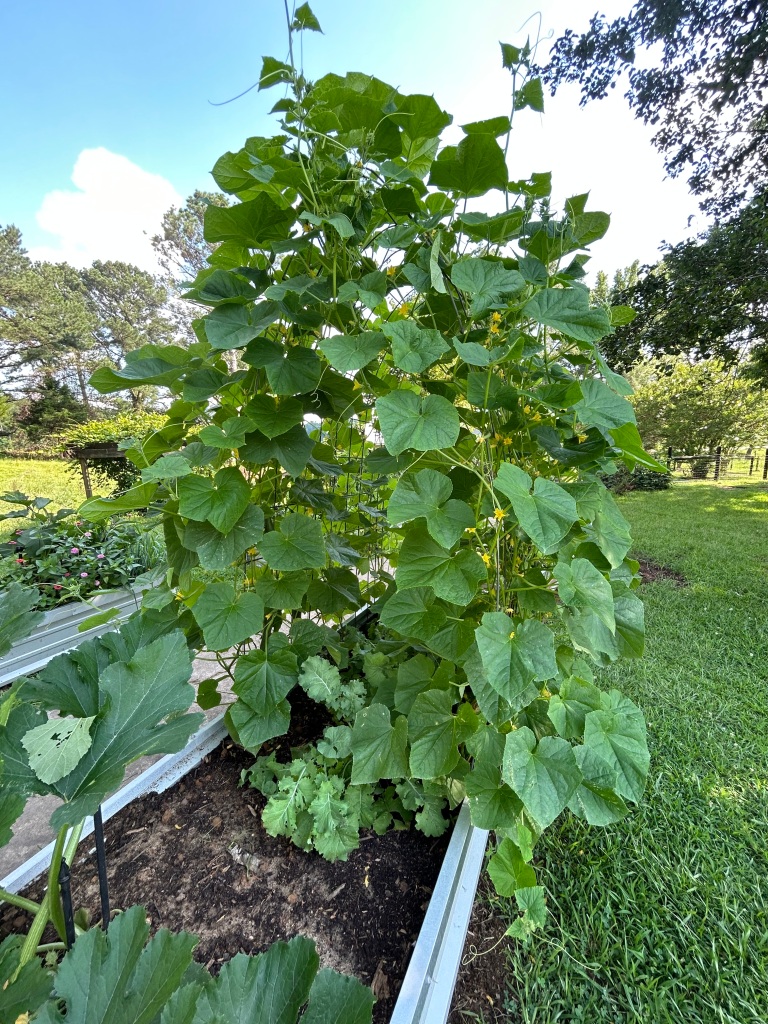
We took an old wire cattle panel to make a trellis for the cucumbers to run on. They love it! I have found that cucumbers that have a structure to run on last so much longer than letting them run on the ground.
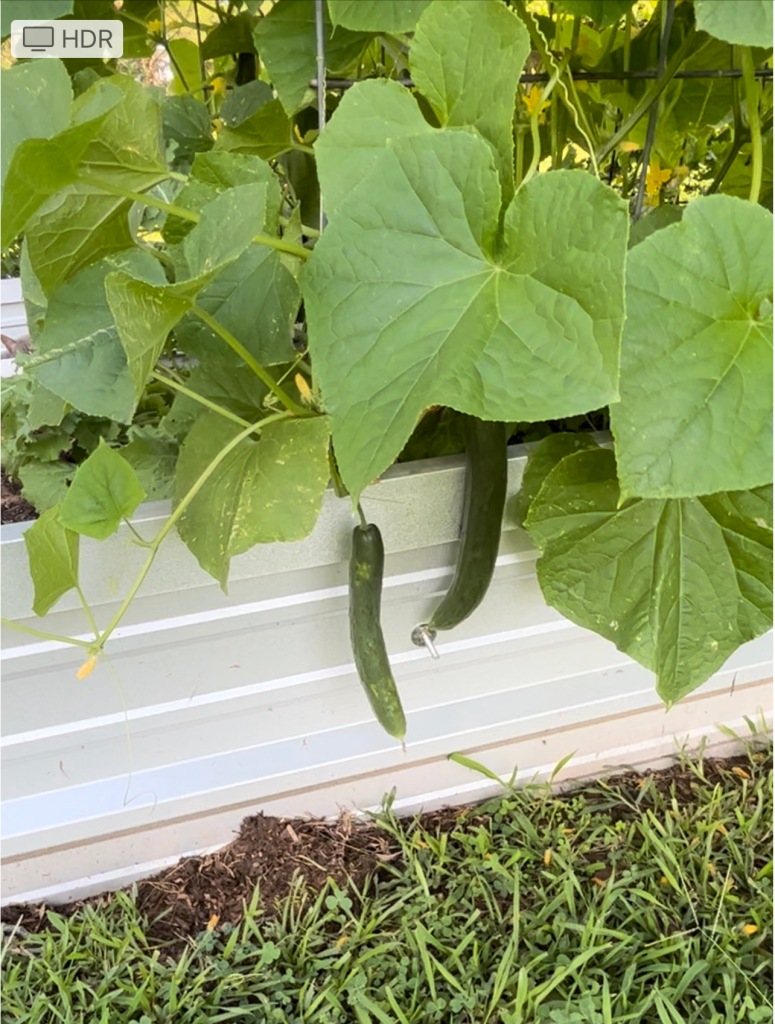
I have no idea which variety these cucumbers are. I fussed and fussed when I saw how long and skinny they are. Until I tasted one! The best cucumbers I have ever eaten! And they would make wonderful pickles! I am definitely saving these seeds.
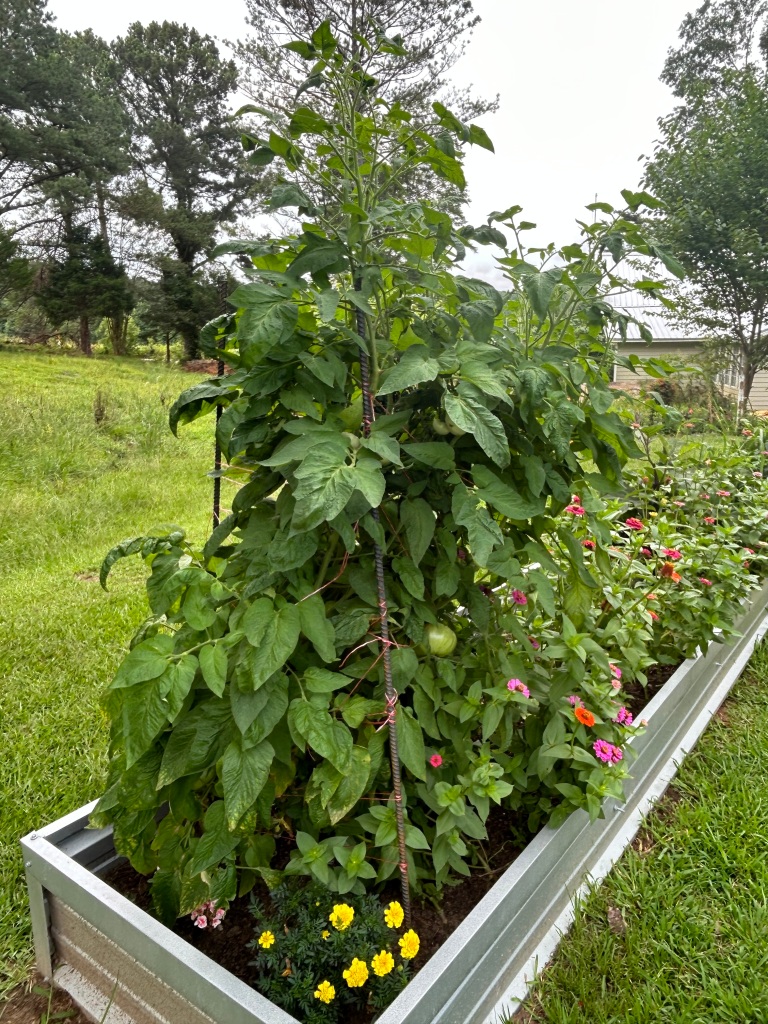
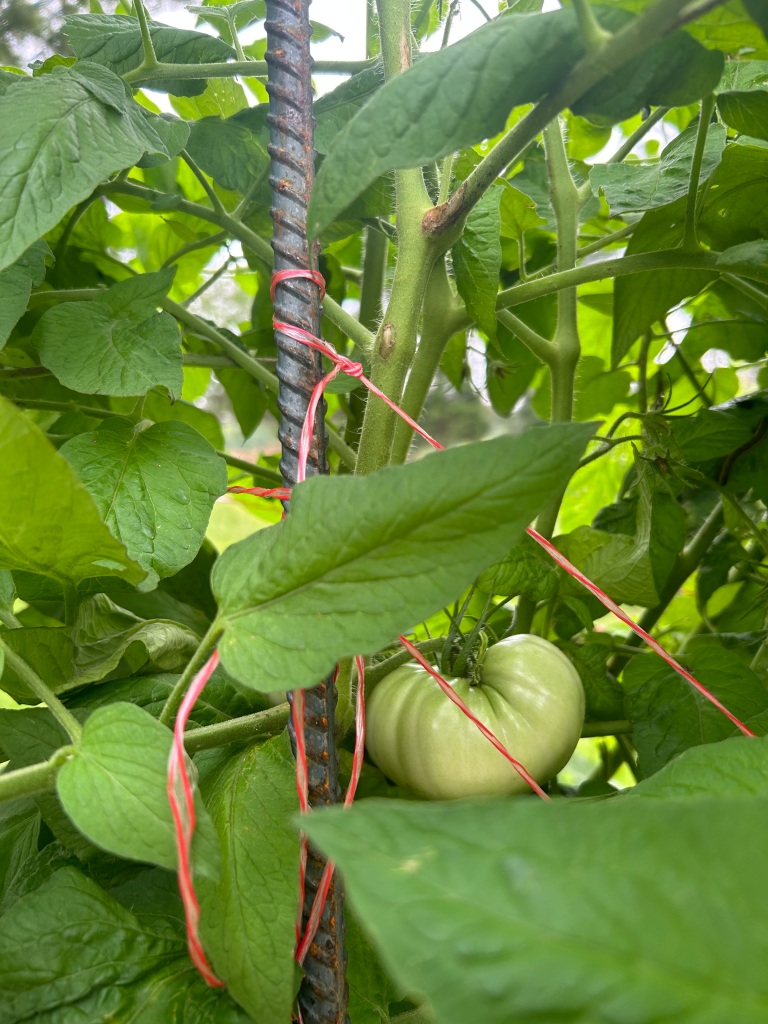
We grow two varieties of heirloom tomatoes. This is a Brandywine. We used a method called the FLORIDA WEAVE to tie them this year. It has really worked well. I have had to go in lately and tie up some individual stems to keep them from breaking because the tomatoes are HUGE!
Brandywine
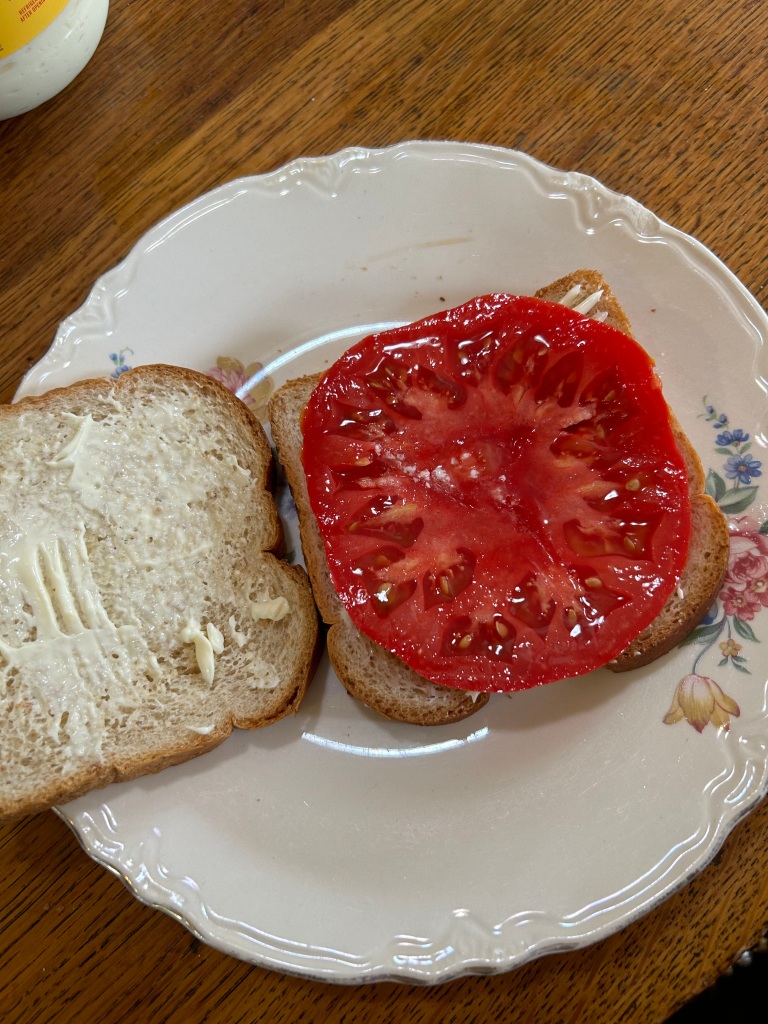
We had tomato sandwiches for lunch. One slice of a Brandywine will completely cover a slice of bread!
As an Amazon Associate, I earn from qualifying purchases. This means, if you click on a link on my blog and make a purchase, I will receive a small commission at no extra cost to you. THANK YOU for helping me start a college fund for Bella! If you want to try BRANDYWINE TOMATOES, here is a link to seed. CHEROKEE PURPLE seed.


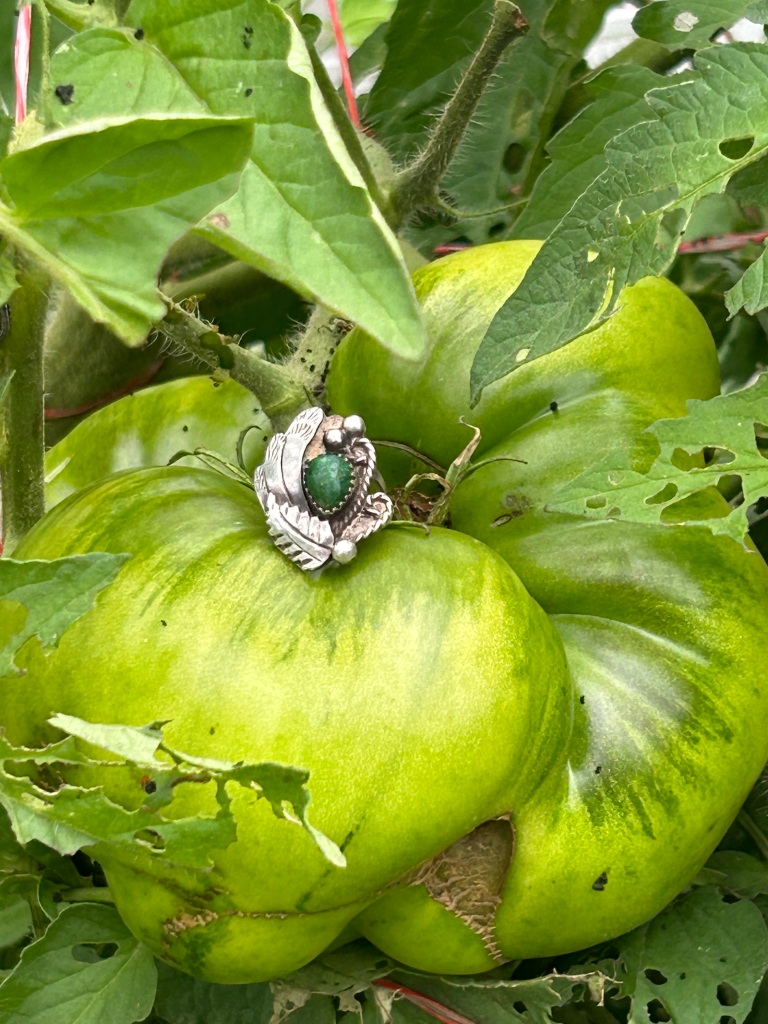
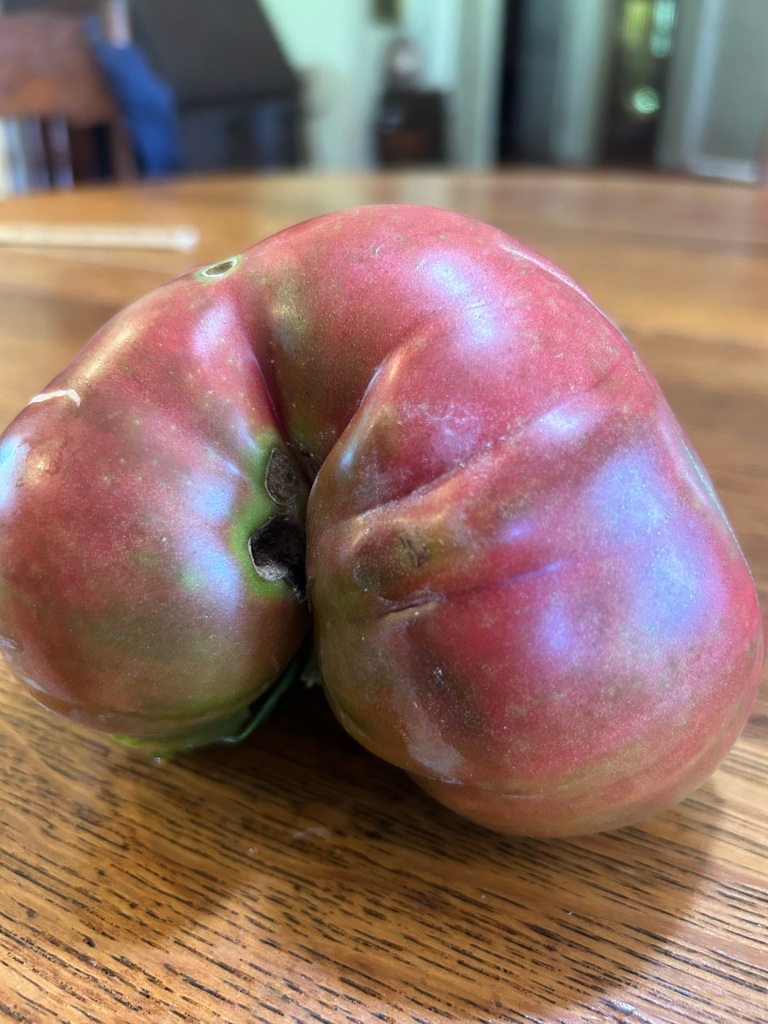
Below is our Cherokee Purple. They are UGLY! But the taste makes up for it. I have put my ring on top so you can judge the size. Both of these plants were started from seed that I saved last year.
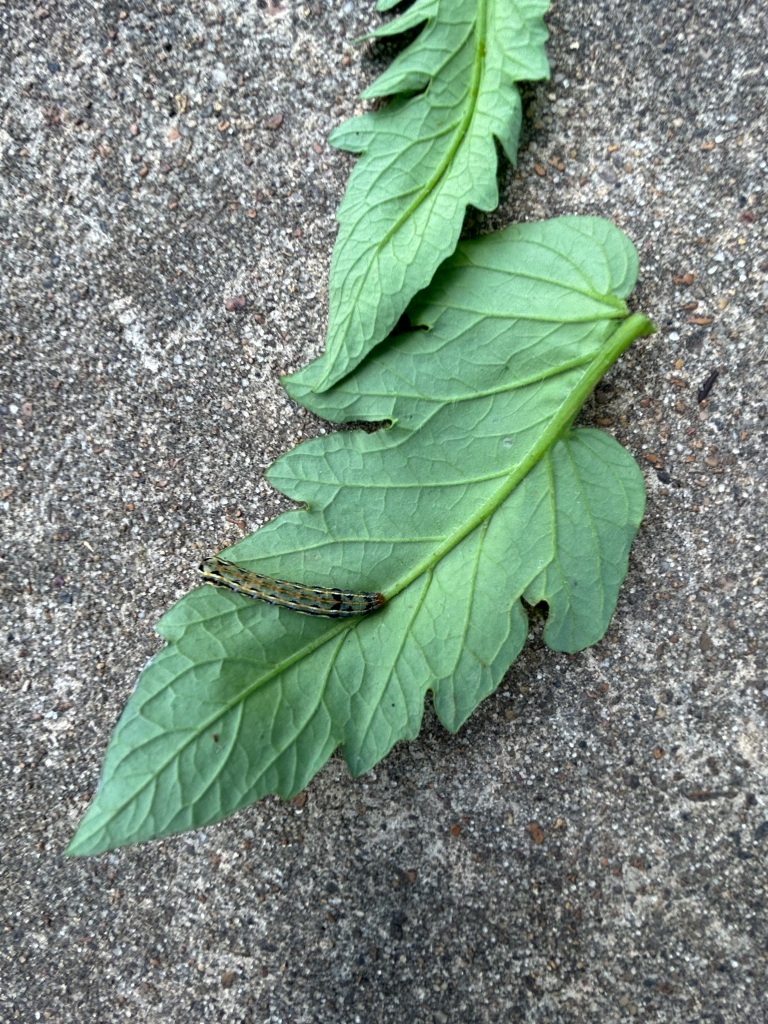
And yes, I did find some stinking little worms eating the leaves of my Cherokee Purple this morning! I picked off a lot (30 or 40) and finally went for the Sevin Dust. My grandmother used this for every kind of garden pest. I do NOT like to use any kind of insecticide, but there were literally dozens of these little worms, and I refused to let them destroy my plant! By the way, the Sevin Dust did kill them! And it kills SQUASH BUGS too! I dust it around the stalk close to the ground. Be careful and not get in on or near your blossoms.
Here is a picture of the little buggers. They are NOT the typical big green horned tomato worms. They were almost black and about an inch long.
As an Amazon Associate, I earn from qualifying purchases. This means, if you click on a link on my blog and make a purchase, I will receive a small commission at no extra cost to you. THANK YOU for helping me start a college fund for Bella! Here is a link to the Sevin Dust and a duster if you would like to check it out.


HUGE CAPACITY POWER DUSTER (I really like this one!)

Thankfully, the worms did not damage the tomatoes–just the leaves. I picked the one in the previous picture today, along with about 7 others. The rough looking spots that you see are typical for a Cherokee Purple tomato. I peeled it, and it is in the fridge now, just waiting for me to make BLTs for supper. I typically would not peel my tomatoes–only when I have had to use dust.
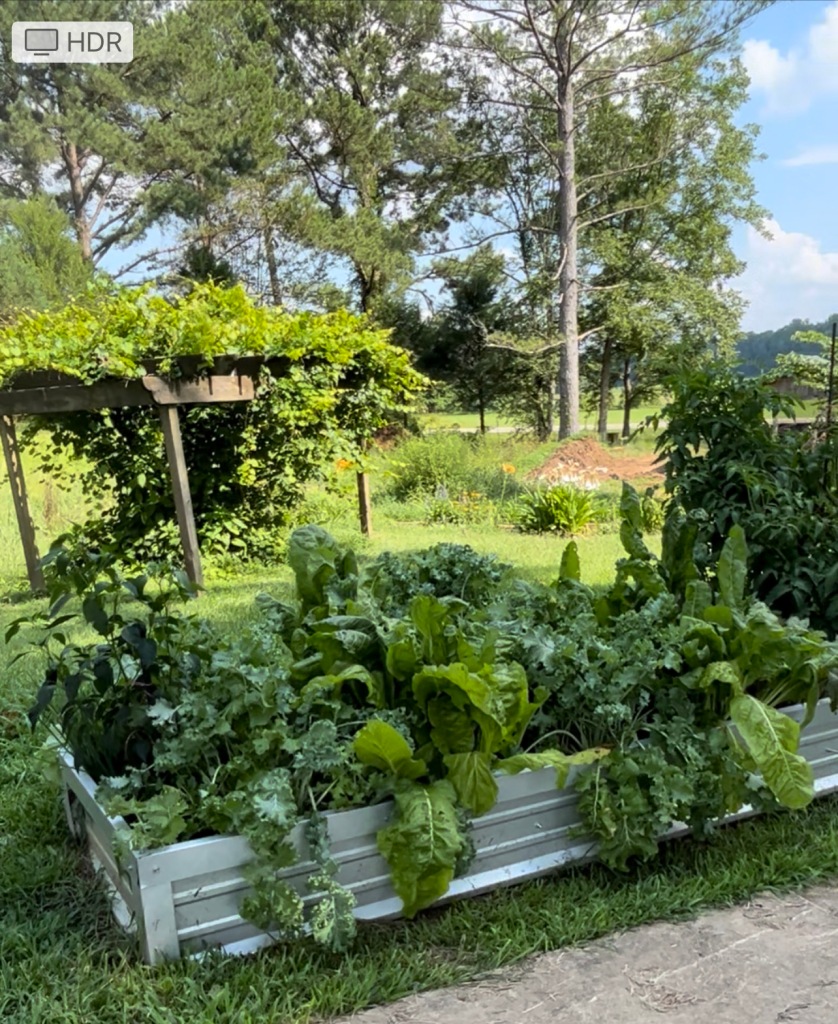
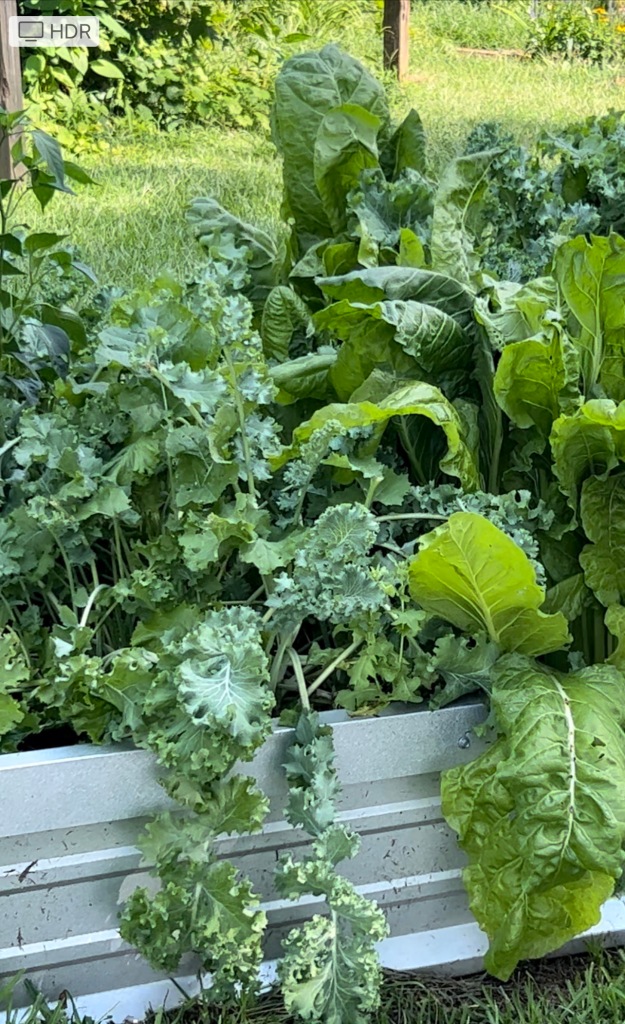
Here is my kale and spinach bed. The spinach is past its prime, but the kale is perfect. Kale will hold up all summer for me here in my Mississippi garden, unlike lettuce. I like to pick the new, blue-green leaves to use in salads, the older leaves for cooked greens, and I use kale in place of lettuce on hamburgers and in BLTs. So I guess we have BKTs.
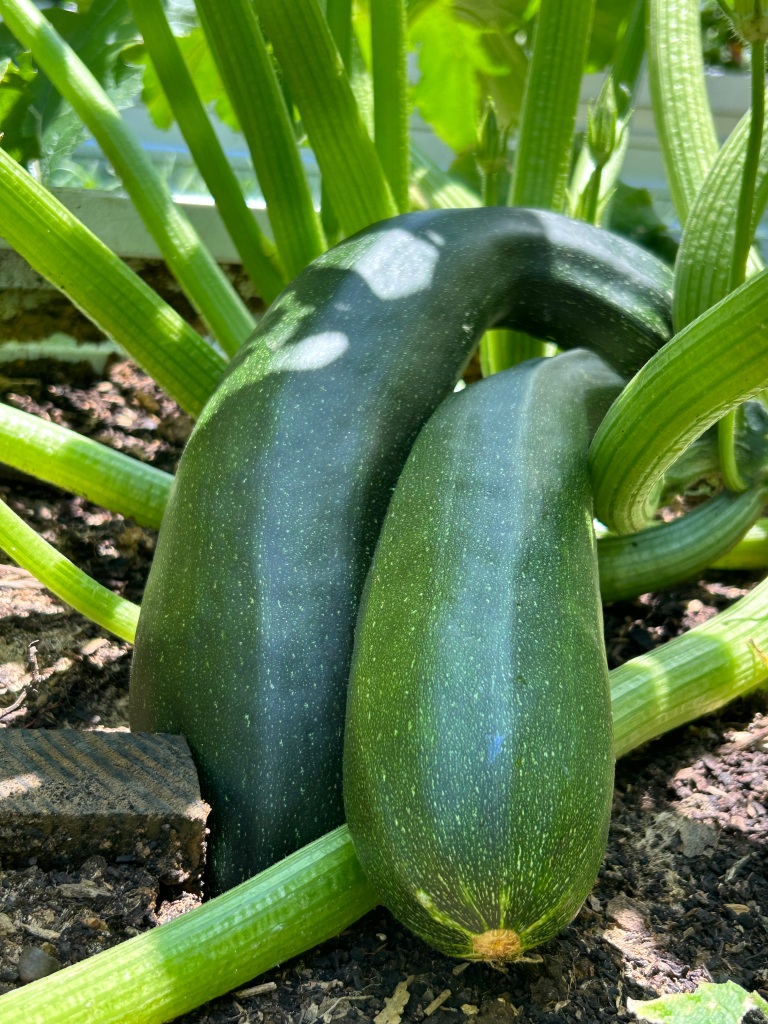
The squash are producing like crazy! I walk down the sidewalk a couple of times a day, always keeping an eye out for squash bugs. They are a HUGE problem in our area–can kill a healthy squash plant in a matter of a couple of days. I pick off every one I can find and then dust the stalk and soil around the stalk with Sevin dust. If you do this about once a week, squash bugs should not be a problem.
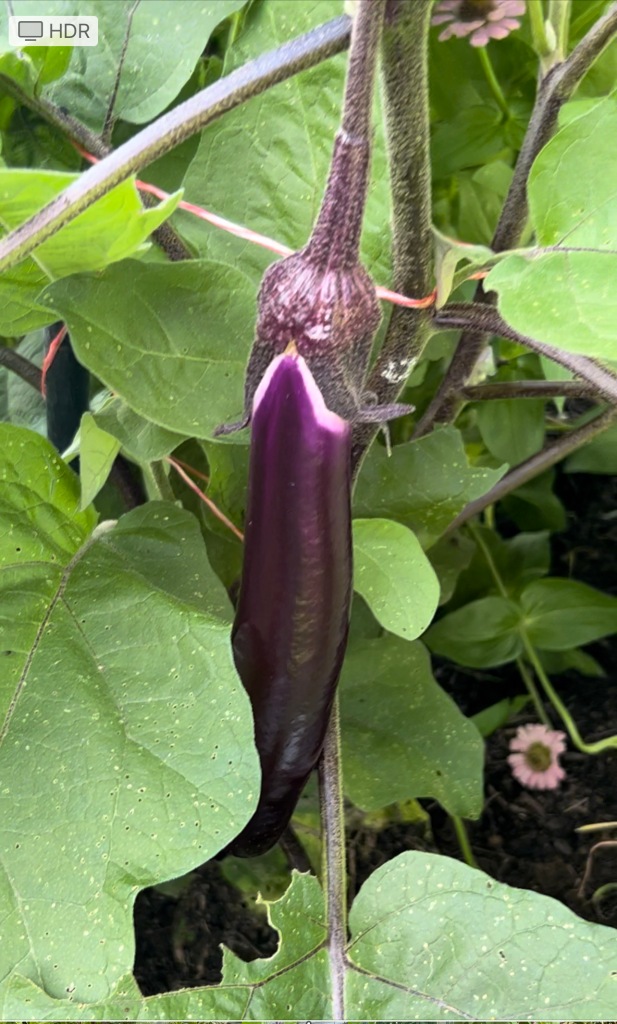
I rarely cook eggplant, but I can’t resist growing them. I think they are absolutely beautiful. I did cook a dish full of eggplant Parmesan today, and It was delicious! Will try to post the recipe soon.
I always plant zinnias in my garden and raised beds. Zinnias bring in soooo many pollinators. To be honest though, I would plant them even if they didn’t. Having flowers in my garden brings me so much joy!
As an Amazon Associate, I earn from qualifying purchases. This means, if you click on a link on my blog and make a purchase, I will receive a small commission at no extra cost to you. THANK YOU for helping me start a college fund for Bella! Here are a couple of links to zinnia seed. I love the LILLIPUT. Their flowers are about an inch to an inch and a half across. I have also grown the CALIFORNIA GIANT–flowers up to 5 inches!


So, to answer the question I started this post with–YES–vegetables and flowers planted in metal raised beds CAN withstand the intense HEAT of a Mississippi summer! The key is plenty of water–every day, or as soon as the soil in the bed starts to look dry.
As an Amazon Associate, I earn from qualifying purchases. This means, if you click on a link on my blog and make a purchase, I will receive a small commission at no extra cost to you. THANK YOU for helping me start a college fund for Bella! I want to share a link to a 7 PIECE GARDEN TOOL SET that I have fallen in love with!

If you are wondering what we filled our raised beds with, here is a link to that post. We only used things available here on our farm–at zero cost to us. I realize that many of you do not have that option, but if you live on a farm, you may have everything that you need and not even know it!
One Down! 5 To Go! Filling Bella’s Raised Garden Beds
Visit us again at Cozy Kitchen Wood Stove for recipes and other tips for vintage cooking, gardening, and just good ole country living!
And don’t forget to scroll to the bottom of the page and SUBSCRIBE to our BLOG! We try to post recipes and tips weekly!

7 responses to “Will plants in metal raised beds survive the HEAT?”
I saw the post on your beds when you were starting the planting….WOW! They have grown!
LikeLike
This is my first go at planting in raised beds. I absolutely LOVE them!
LikeLiked by 1 person
Your garden is beautiful and what good eating. Gosh it is hot here too- but I know it is worse there. I am so sorry.
LikeLike
Actually, we have had a relatively mild summer for Mississippi. We are in the dog days of summer now, and the breeze was so cool and delightful today!
LikeLiked by 1 person
I clicked into this post because I just setup raised metal beds. I saw you are from Mississippi. Cool. I live in Crystal Springs.
LikeLike
I have visited there. This is the second year for mine. They are still doing great!
LikeLike
I’m loving my new ones. Seeds are sprouting. Let the growing begin 🙂
LikeLike