
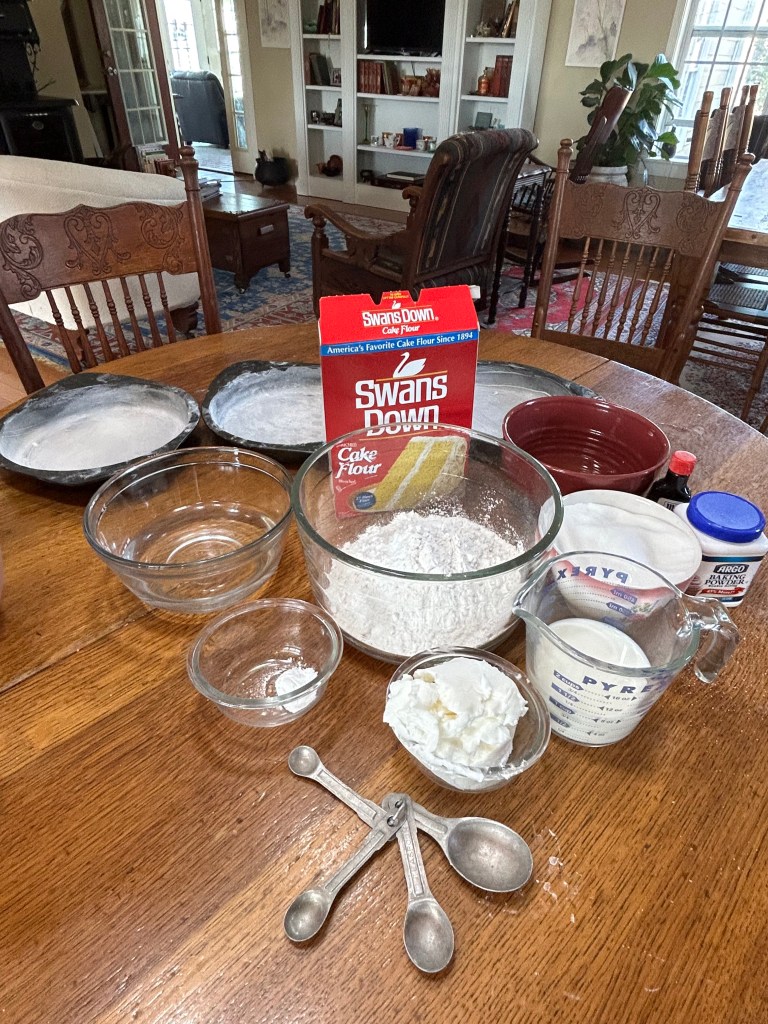
Simple ingredients–from scratch
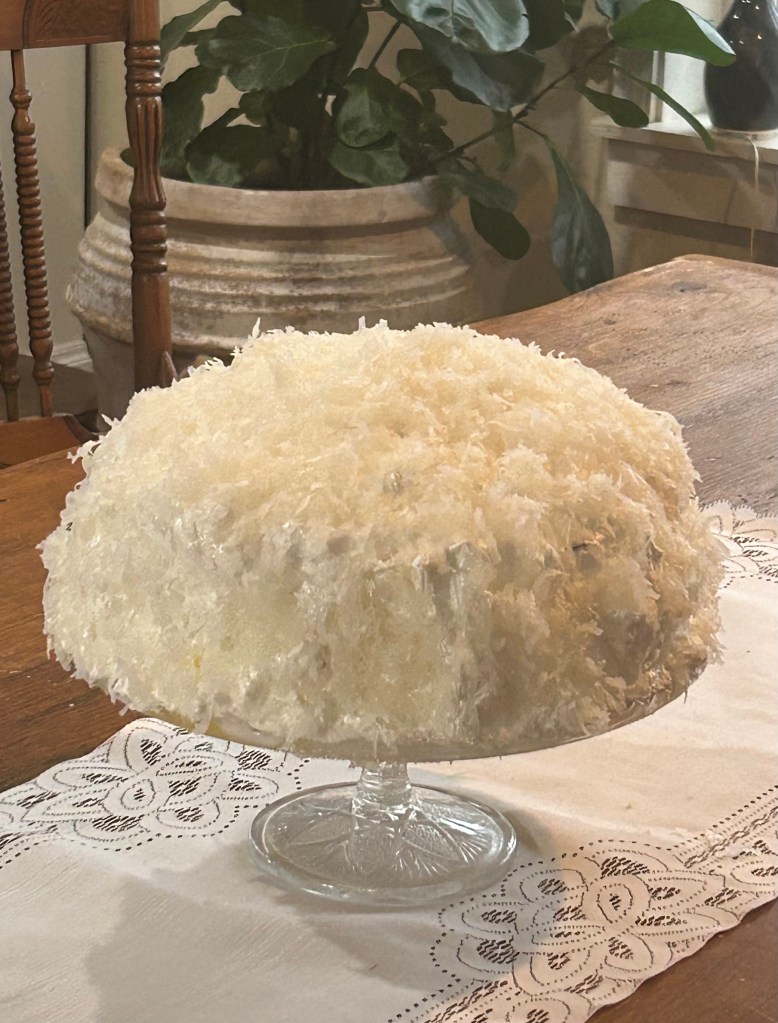
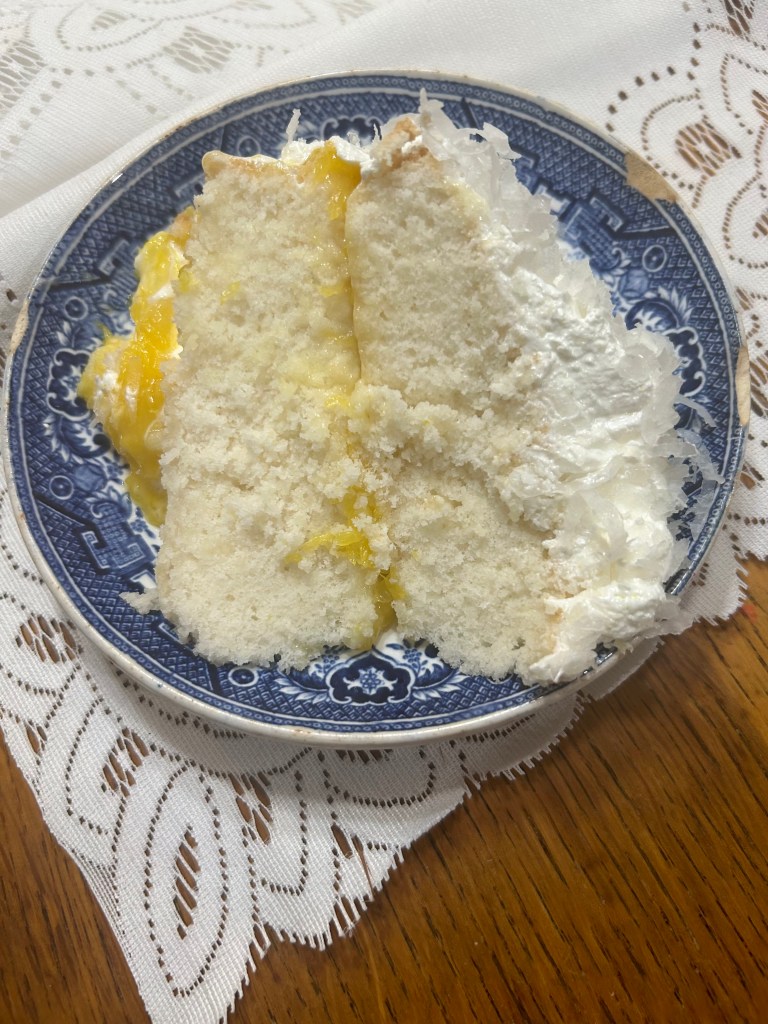
The orange filling between the layers makes this white cake oh so moist–-And the orange 7 minute frosting adds additional flavor!
This is a wood stove friendly recipe developed at Cozy Kitchen Wood Stove! –you won’t find it anywhere else!

Tip: If you have tried everything, and your wood stove still won’t bake, try a layer cake!
I grew up with a coconut cake on the table. It was a family favorite! This recipe developed here at Cozy Kitchen Wood Stove works well in a wood cook stove. If you are having trouble baking a cake, try layer cakes. Since they are much thinner than bundt cakes, they bake much more quickly without drying out.
It was my husband who actually suggested this! He said there was probably a REASON all of the old-time cakes were layer cakes. And come to think about it, when I was a child, a lot of the cakes had 3 or 4 layers!
Another reason I love layer cakes–there is more filling and frosting–some for EVERY BITE!
I have learned to bake a bundt cake in my wood cook stove, but it was definitely a learning curve. I think my main problem at first was not getting my oven hot enough prior to baking time.
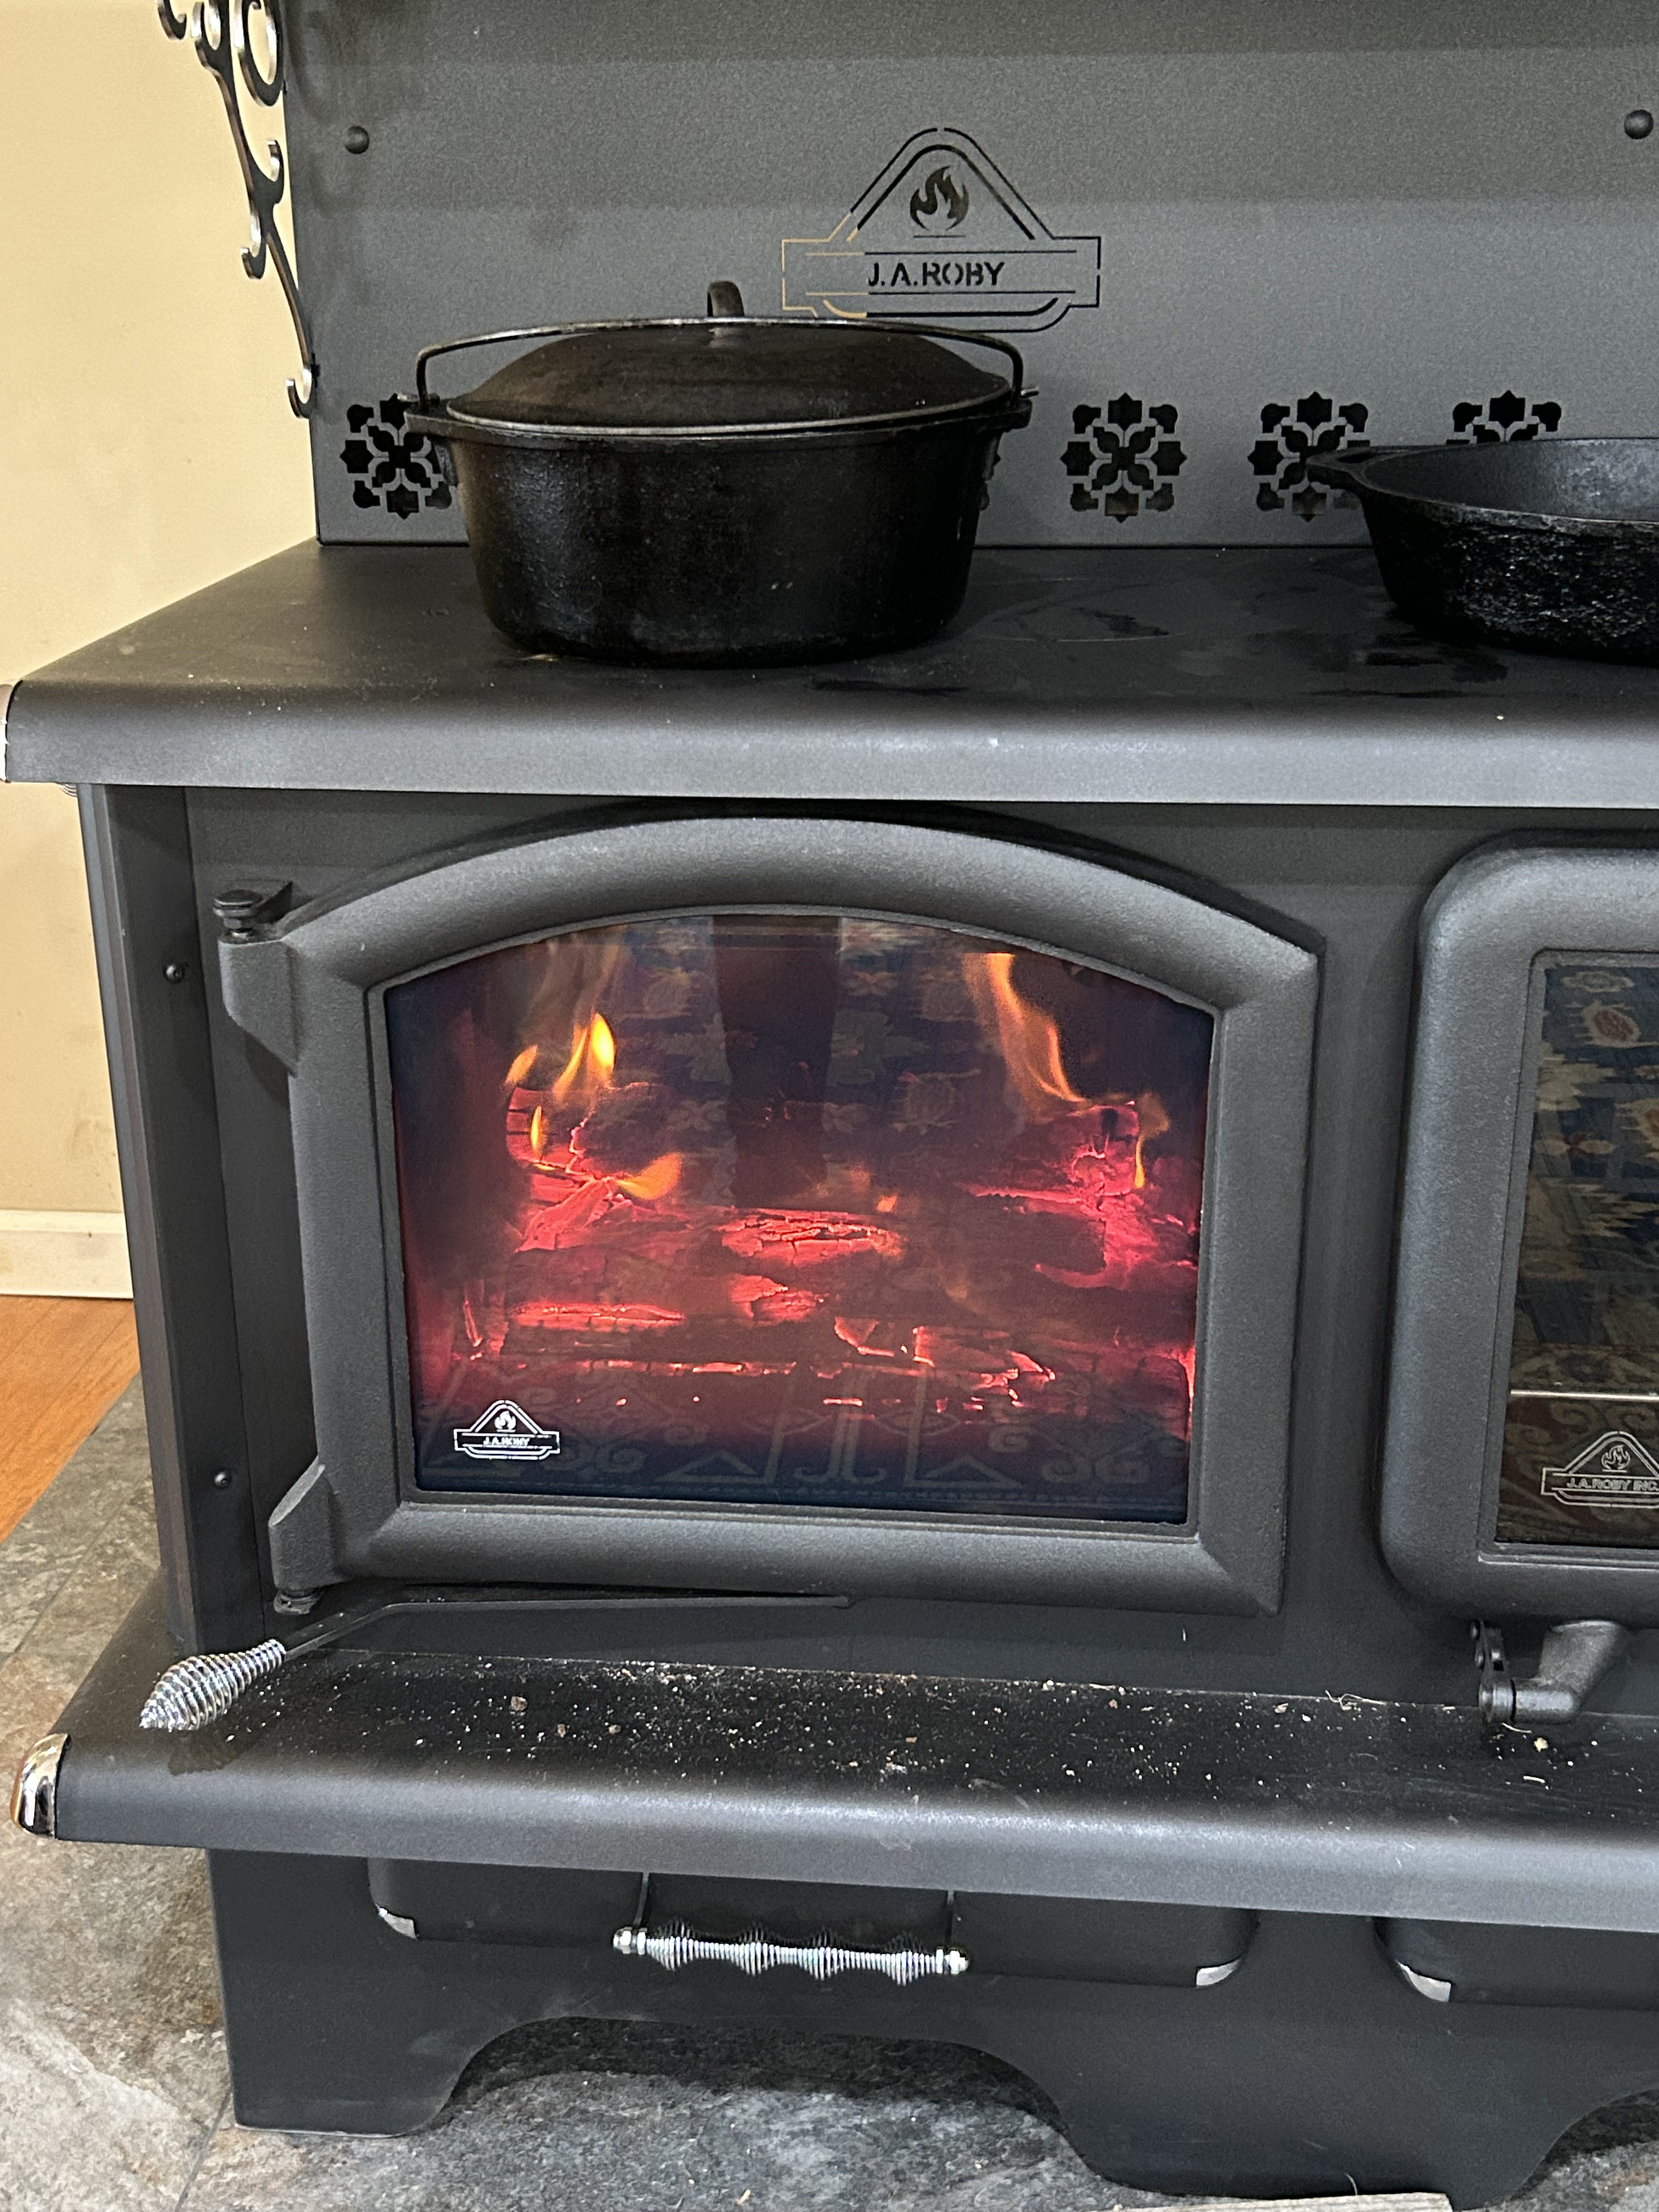
First of all, you need very DRY firewood. It needs to have been cut and in the dry for at least 6 months. A year is better. And hardwood such as oak, hickory, ash, or locust is better than soft woods. We never use pine because it burns too quickly and can be more prone to building up carbon in your flue system due to its high resin content.
You need to open all dampers and air intake vents and keep them OPEN until the oven is up to temperature. You will keep adding wood to your firebox until you have a glowing, red hot bed of coals. And then keep adding wood on top of these coals to keep the oven up to temperature.
If you have a thermometer on your oven, (I do), watch it carefully. If the temperature creeps up past 400 while baking a cake, partially close a damper to cut out part of your air. This will cool it down. You do NOT have to keep a constant 350 temperature for your cake to turn out beautiful!
You may also have to turn your cake while baking to get it to brown evenly. I don’t turn my pans, but I do have to push the front pan to the back after removing the back pan and leave it an additional 3-4 minutes to get a brown top.
The back left corner next to the firebox is the sweet spot for baking in my particular oven. Things will bake and brown much more quickly in this spot. Your stove may have a different sweet spot. Don’t be afraid to try different areas of your oven. More than likely, you will find a spot near your firebox that cooks better than other areas of the oven.
Confession time. Bella and I ran into a problem baking this cake. We poured batter into 3 cake pans, and when we went to put it into the wood stove oven, only 2 pans would fit! Panic time!
We poured the batter from the 3rd pan evenly into the other two pans and quickly shoved them into the oven! Whew!
Yes, I can get an additional rack for my J A Roby. I was being cheap and did not order a second, because it did not come with the stove. That is on my to-do list for next week!
This recipe has 3 parts:
- The cake batter
- The orange filling
- The orange 7 minute frosting
Coconut Cake
2 1/2 C. sugar
1 C. Crisco
3 1/2 C. cake flour / all-purpose flour will work
6 egg whites
5 t. baking powder
1 C. whole milk
1/2 C. boiling water
2 t. vanilla extract (pure)
METHOD:
BEAT: 6 egg whites until stiff peaks form and set aside.
CREAM: 2 C. of the sugar with 1 C. Crisco.SIFT: together 5 T. baking powder with 3 1/2 C. cake flour.
SIFT: together 5 T. baking powder with 3 1/2 C. cake flour.
ADD: flour to creamed mixture alternately with 1 C. whole milk.
FOLD: the remaining 1/2 C. sugar into the stiffly beaten egg whites.
FOLD: the egg whites into the cake batter.
ADD: 1/2 C. Boiling water and the 2 t. Vanilla extract.
BAKE: 350° for about 35 minutes for two layers. Check in 25 min. For three layers. Always test for doneness by inserting a toothpick into center of cake. If it comes out clean, the cake is done. My granny gently tapped the center of the cake. If it sprang back into shape, it was done.
THE CAKE BATTER:
Ingredients:
- 2 1/2 C. sugar
- 1 C. Crisco
- 3 1/2 C. cake flour / all-purpose flour will work
- 6 egg whites
- 5 t. baking powder
- 1 C. whole milk
- 1/2 C. boiling water
- 2 t. vanilla extract (pure)
Method:
- BEAT: 6 egg whites until stiff peaks form and set aside.
- CREAM: 2 C. of the sugar with 1 C. Crisco.
- SIFT: together 5 t. baking powder with 3 1/2 C. cake flour.
- ADD: flour to creamed mixture alternately with 1 C. whole milk.
- FOLD: the remaining 1/2 C. sugar into the stiffly beaten egg whites.
- FOLD egg whites into batter.
- ADD 2 t. vanilla flavoring and 1/2 C. boiling water.
- POUR: into 3 greased and floured cake pans.
- BAKE at 350° for 30-35 minutes. Check by inserting a toothpick into the center of the layer. If it comes out clean it is done. Or you can gently tap the center. If it springs back, it is done!
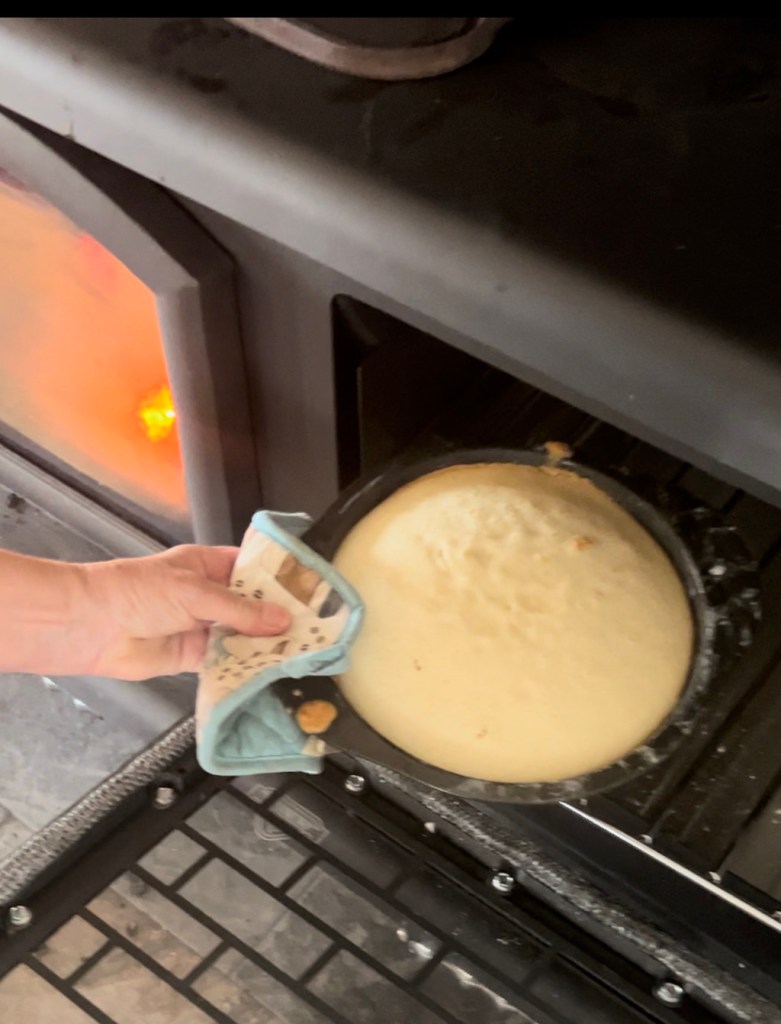
Bella had to bake two layers instead of three. When I put the pans in the oven, the third pan wouldn’t fit. Ordering a second oven rack this week!
Also, I did not rotate the pans, and the one in the back left corner browned more that the front pan. My back left nearest the firebox is the hottest part of my oven. Here is an image to show the difference.

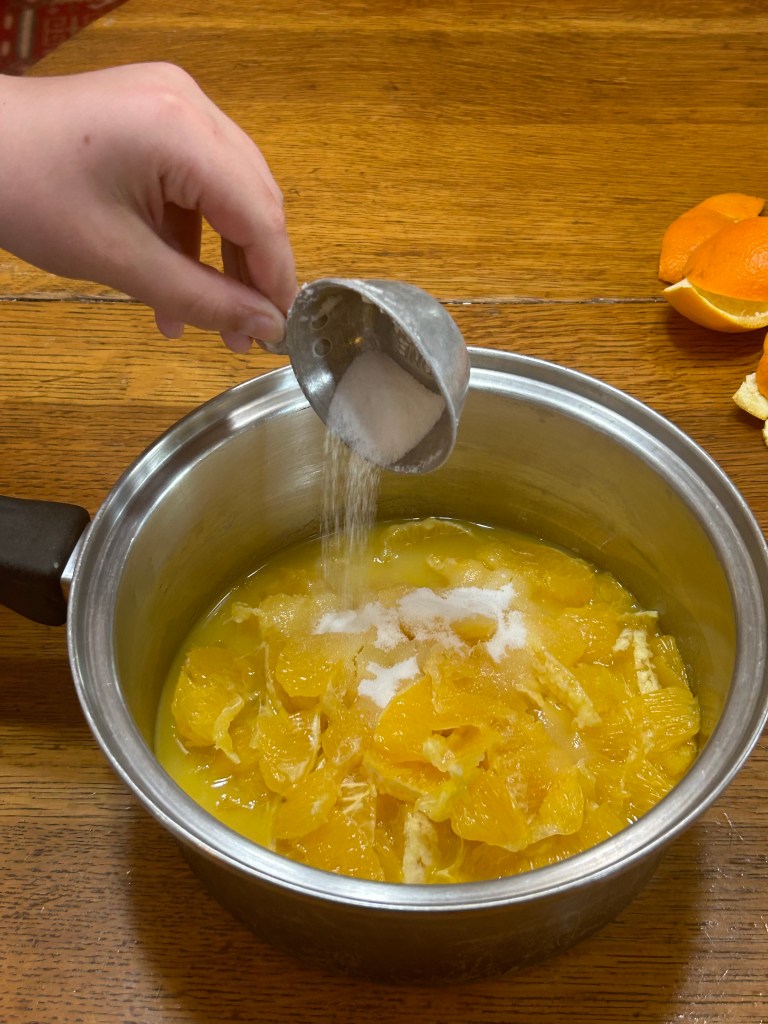
The Orange Filling:
Orange Filling
4 Navel oranges / 2 C. Sections
Orange juice
1/3 C. Sugar
2 T. + 1 t. Cornstarch
METHOD:
PEEL: 4 navel oranges
SLICE: each individual section down the middle, removing the pulp from the hull. Place pulp in 2 C. measure. When you have 2 C. of sections, pour enough orange juice in cup to cover sections.
ADD: to a saucepan, the 2 C. oranges, 1/3 C. sugar, 2 T. + 1 t. cornstarch.
COOK: until thick–stirring constantly.
REMOVE: from heat and cool completely. You may want to put it in the refrigerator while you finish the cake and the 7 minute frosting.
Ingredients:
- 4 navel oranges / to make 2 C. orange sections
- orange juice–enough to cover oranges
- 1/3 C. sugar
- 2 T. + 1 t. cornstarch
Method:
- Peel 4 navel oranges.
- CUT: sections down the middle and remove pulp into a 2 C. measure. You will need 2 C. of hulled pulp.
- ADD: enough orange juice to cover the pulp.
- POUR: orange sections into a pan.
- ADD: 1/3 C. sugar, 2 T. cornstarch + 1 t.
- COOK: until thick–stirring constantly.
- COOL: completely.
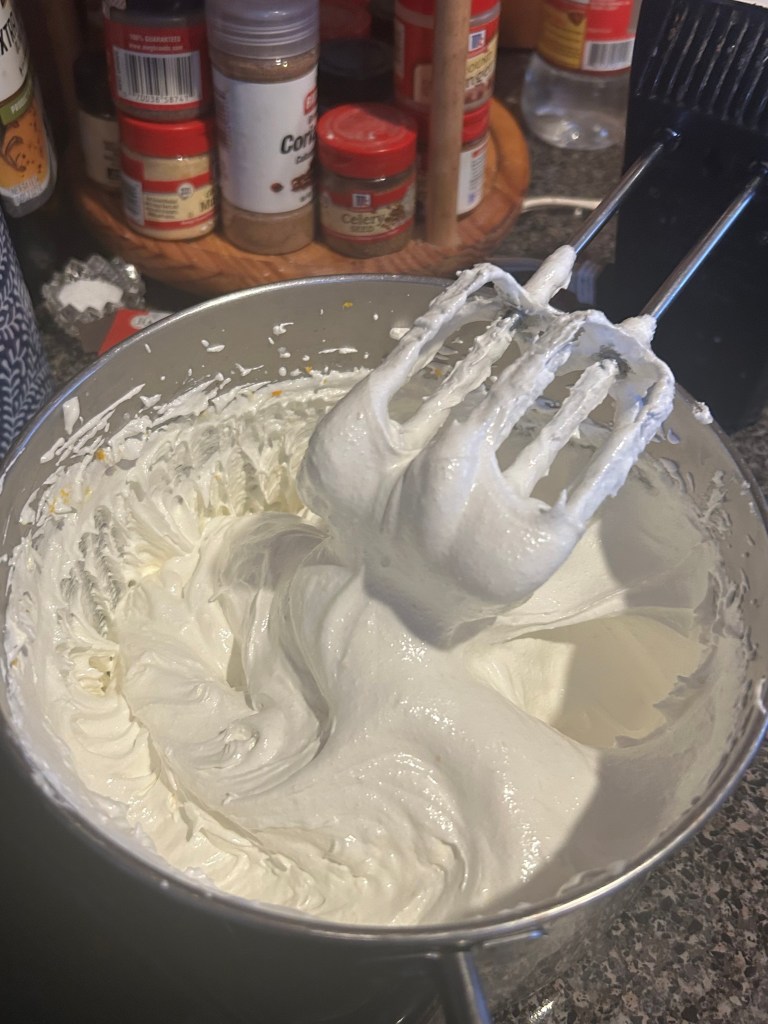
The Orange 7 Minute Frosting:
Orange Frosting
1 1/2 C. Granulated sugar
1/4 C. + 1 T. COLD water
2 T. Light corn syrup
1/2 t. Orange extract
1 t. Orange zest
METHOD:
BRING: water to a boil in the bottom of a double boiler.
ADD: (to the top pan) 2 large egg whites, 1 1/2 C. granulated sugar, 1/4 C. + 1 T. COLD water, 2 T. light corn syrup
PLACE: the pan over the boiling water.
WHIP: on medium speed for 3 minutes.
INCREASE: speed to high and whip 3 more minutes.
REMOVE: from heat.
ADD: 1/2 t. orange extract and 1 t. orange zest.
BEAT: 1 minute on high.
Ingredients:
- 2 large egg whites (do not whip)
- 1 1/2 C. granulated sugar
- 1/4 C. COLD water + 1 T.
- 2 T. light corn syrup
- 1/2 t. orange extract
- 1 packed t. orange zest
Method:
- BOIL: water in bottom of a double boiler (or you can set a heat-proof bowl inside a regular pan filled 1/4 full of water if you do not have a double boiler.)
- ADD: to top pan of boiler–2 egg whites (not whipped), 1 1/2 C. granulated sugar, 1/4 C. + 1 T. COLD water, 2 T. light corn syrup.
- WHIP: with electric mixer on medium as you cook for 3 minutes.
- INCREASE: speed to high and cook additional 3 minutes.
- REMOVE: from heat and add 1/2 t. orange extract and 1 t. orange zest.

- RETURN: to heat and continue whipping on high for 1 minute.
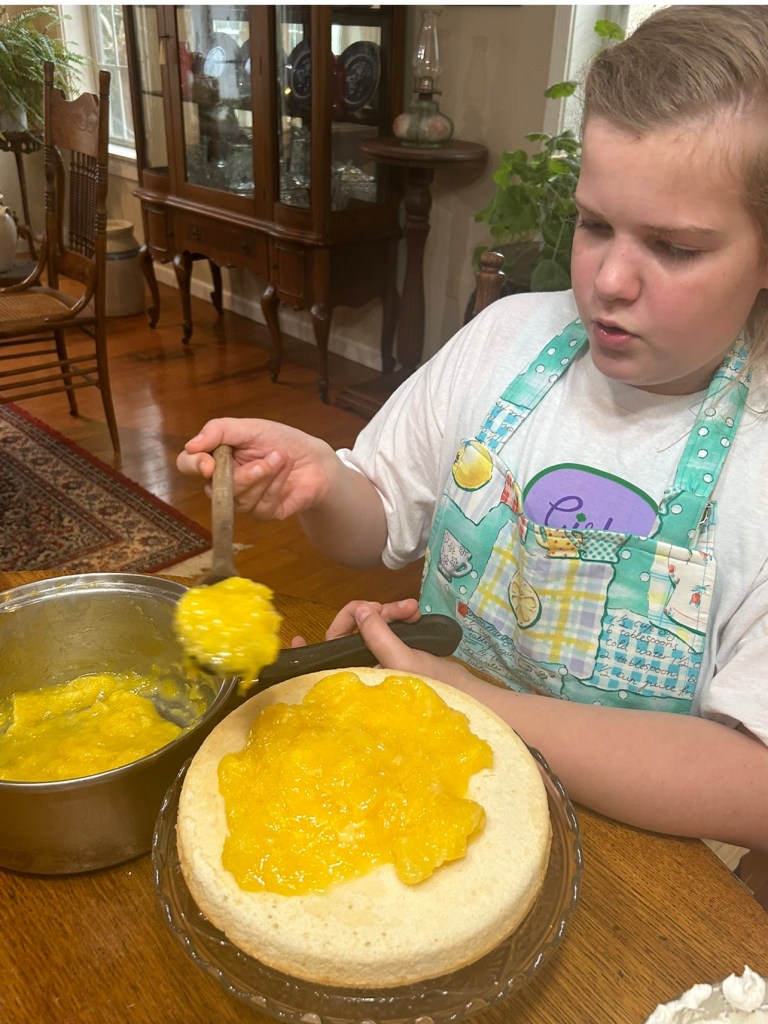
ASSEMBLING THE CAKE:

- PLACE: bottom layer on your cake stand.
- PUT: orange filling on top of bottom layer.
- ADD: top layer. If you are baking three layers, the filling goes between each layer.
- FROST: the top and sides with the orange 7 minute frosting.
- SPRINKLE: (generously) shredded coconut over top and sides.

January is my month to just get through. I am NOT a winter person, but cooking on the wood stove this year has definitely made me think again. It has been such a special time for my granddaughter Bella and me.
And this coconut cake is the perfect end to one of our worst winter months here in north central Mississippi. I saw the first daffodil blooming last week and counted over 50 robins in our front yard! Spring is definitely on the way in the Southland!
Weekly Timeless Treasure
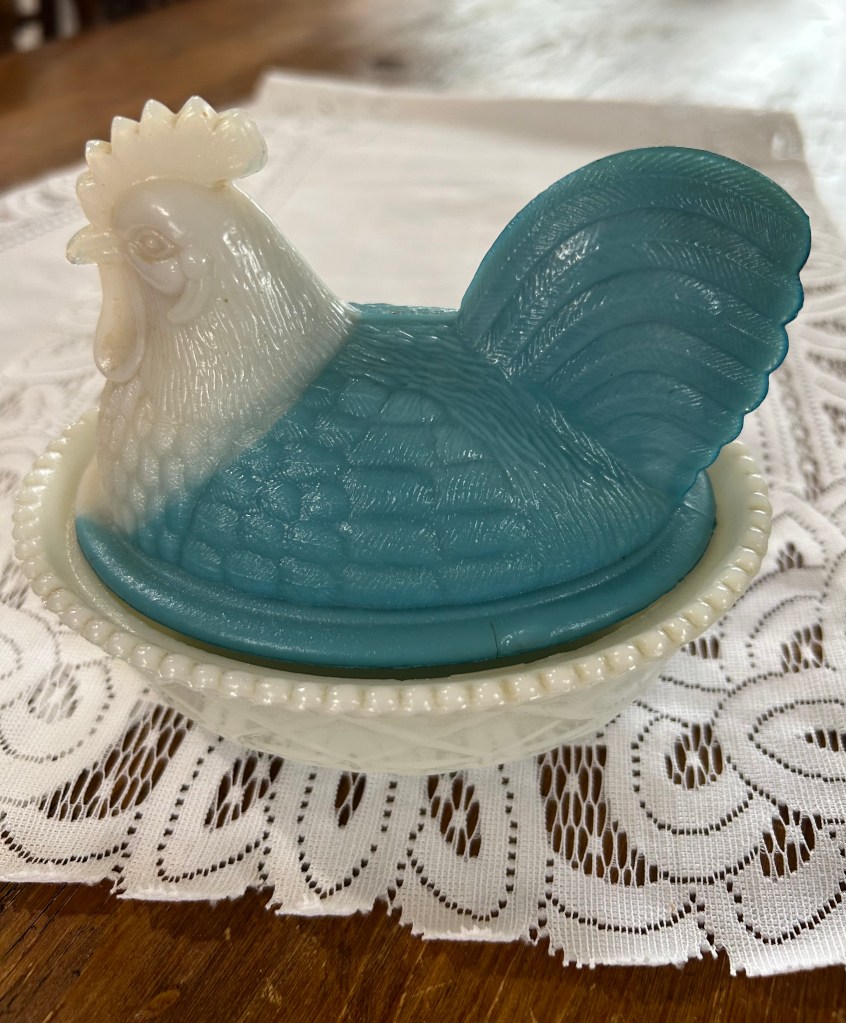
My mother loved to collect antique glass. When I was a child, we rode through the countryside of Calhoun and Yalobusha counties asking around at old home places if they had anything they wanted to sell.
This little blue, milk glass butter bowl was one of my favorite finds. Mother said it was special because it was a little rooster. Most of the butter dishes where hens.
Back in those days, the mid-sixties, most of the country roads here in north central Mississippi were dirt–red clay, with very little gravel. After a rain, if you weren’t careful, your car would slide into the grader ditch! My oh my, those old red clay roads were slick! And you had to depend on the kindness of strangers to pull you out!
Now, I think we take our cell phones for granted. Help is just a click away.
Be sure to check back the first week in February. We are constructing raised garden beds along the front walk. I think you will like our design using galvanized metal roofing!
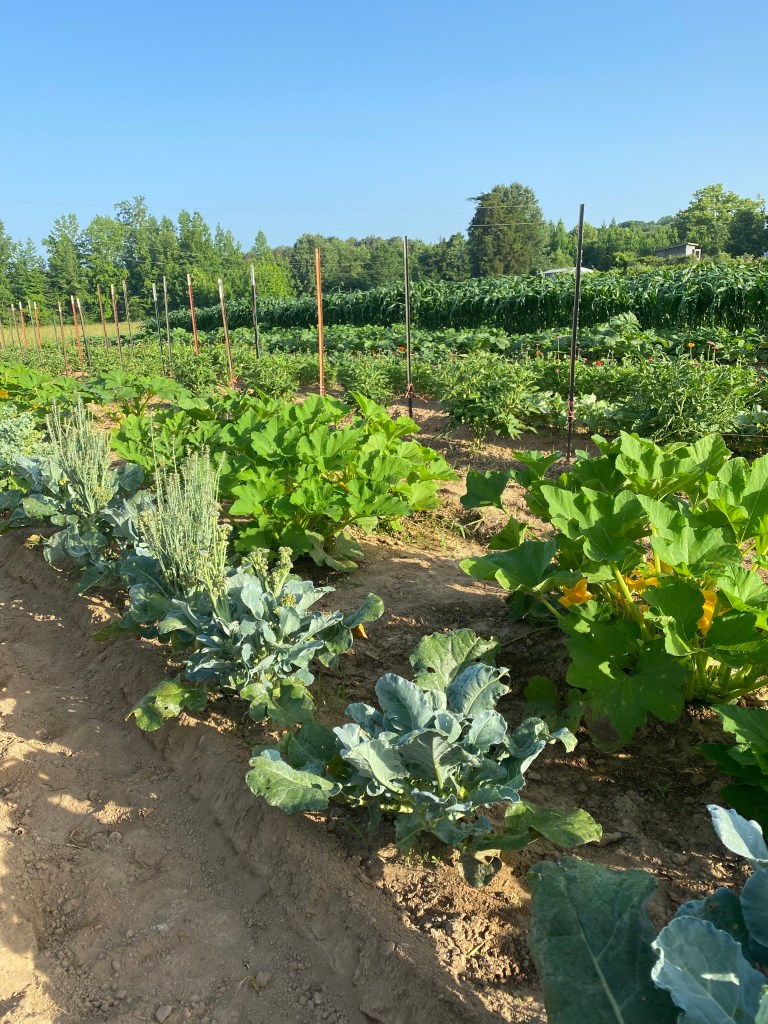
Bella and I usually plant in a big garden spot beside the house. This year we are adding 8 long raised beds along the sidewalk for cucumbers, tomatoes, salad greens, peppers, etc.
We will still use our big plot for corn, beans, cow peas, cantaloupe, and watermelon.
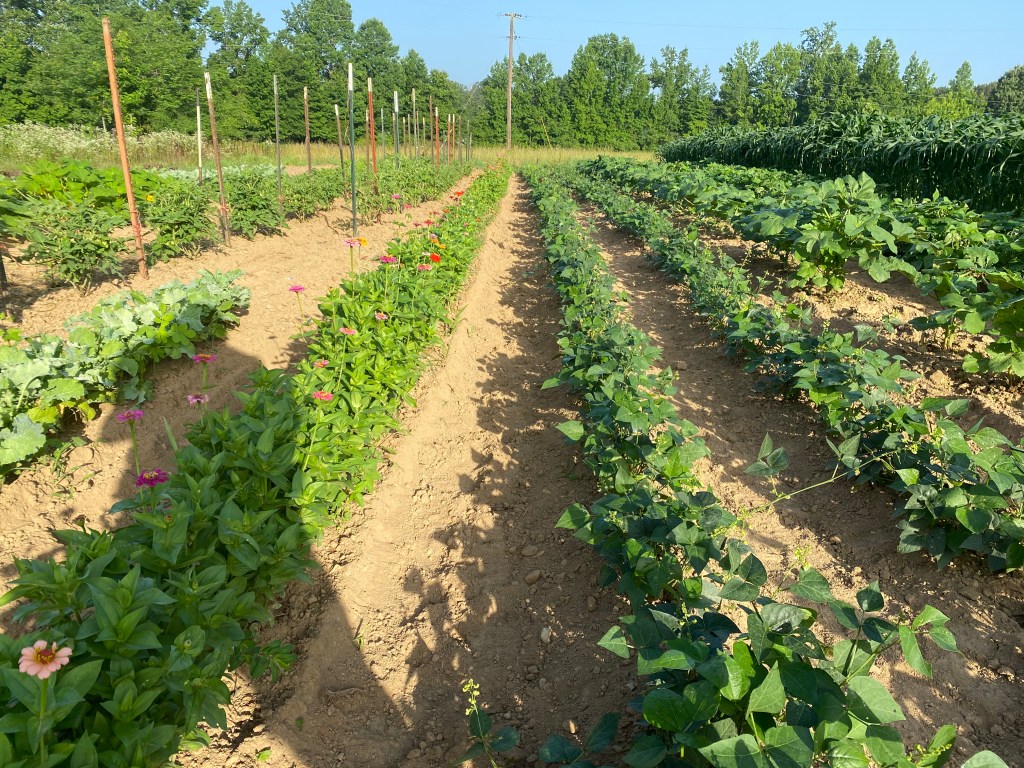
You may notice a long row of zinnias down the center of the garden. I have done this for years. The beautiful flower blossoms attract a wide variety of pollinators. Plus, I just learned that zinnias are edible! Probably won’t fix a zinnia dish, but Bella and I will sure be decorating cakes with them this summer since they are not toxic!

3 responses to “Bella Bakes Old-Time Coconut Cake with Fresh Orange Filling!”
This looks so good! I wish I had a wood stove. We used to have one once when I was a kid. My mom used it quite a bit.
LikeLiked by 1 person
Bella loves ours. I hope she will continue to bake on one when she is grown!
LikeLiked by 1 person
It appears she is already an accomplished young chef. So great to see someone Young developing these talents. And there’s just something so heart warming and nostalgic about wood stoves. I believe there may be a day in the near future when they might also be a necessity. I am enjoying your blog!
LikeLiked by 1 person