
Bella wanted to bake a birthday cake for her daddy today. His favorite is plain vanilla, so we brought out my grandmother’s vintage Yukon’s Best cookbook.
Tip:
Try substituting pure almond extract for the vanilla. The flavor is decadent–a rich indulgence with unexpected flavor. People will rave!
As an Amazon Associate, I earn from qualifying purchases. This means, if you click on a link on my blog and make a purchase, I will receive a small commission at no extra cost to you. THANK YOU for helping me start a college fund for Bella! I am providing a link for PURE ALMOND EXTRACT, a link for PURE VANILLA EXTRACT and a link for CLEAR VANILLA FLAVOR.


When baking, always make sure that you purchase PURE extract. You many think you have found a bargain, but if it says FLAVOR rather than PURE EXTRACT, it is an artificial flavor. The flavors never taste the same to me. I can even detect a chemical taste. I am not about to work so hard to produce a homemade product to have an off flavor from a cheaper flavoring.
As I was researching these links, I became curious about the difference between regular Vanilla Extract and Clear Vanilla. I got sidetracked, as we so often do. So I decided to do a little research.
It is the process involved in the production. Regular Vanilla Extract is made my infusing vanilla beans in an alcohol–usually Vodka. You can actually do this at home! I will provide the super easy recipe a little later in this post. I have a friend who does this at home, and the flavor is so much more intense! It is easy to tell the difference between store bought vanilla and homemade–just with a simple sniff!
What a wonderful Christmas present for a friend to loves to bake! I will definitely be making quite a few bottles here at Cozy Kitchen Wood Stove for special friends this Christmas. It takes 6 months of infusion time, so if your are thinking about this for Christmas gifts–start soon!
Clear vanilla, as it turns out, is actually a FLAVOR, and not a pure extract. The Clear Vanilla uses an artificial compound in its production. If you see FlAVOR on the bottle, that is a dead giveaway. It seems bakers prefer the clear when making a white, white cake or frosting.
How to Make Pure Vanilla Extract at Home!
The recipe is so simple! You only need 2 ingredients:
- 6 MADAGASCAR VANILLA BEANS
- 8 oz. alcohol (Vodka, bourbon, brandy, or rum)–It seems most prefer Vodka
METHOD:
- SLIT the 6 vanilla beans down the middle. If it won’t fit in your bottle, cut into pieces.
- PUT the slit vanilla bean in your bottle. (Sterilize bottle first by boiling for 10 minutes.) Allow bottle to dry.
- POUR 8 oz. of Vodka over bean. If 8 oz. will not cover the beans add more to completely cover the vanilla beans.
- INFUSE or let sit in Vodka for 6-12 months in a dark cabinet.
- SHAKE occasionally.
After 6 to 12 months, you may start cooking with your Vanilla. You can leave the beans in the bottle, and each time you use some, add more Vodka to top off your bottle. You can keep topping off bottle for up to a year after your first use!
If you do not have more Vodka to add, remove your vanilla beans. If they sit without being completely covered, they will get slimy. If you plan to give the bottles of vanilla extract as gifts, you should remove the beans first.
The flavor of homemade vanilla is far superior to that bought in stores! Open the bottles and sniff each! You will be amazed!
As an Amazon Associate, I earn from qualifying purchases. This means, if you click on a link on my blog and make a purchase, I will receive a small commission at no extra cost to you. THANK YOU for helping me start a college fund for Bella! I am providing a link for 12 MADAGASCAR VANILLA BEANS, a link for 50 MADAGASCAR VANILLA BEANS if you are going to make extra bottles for gifts. And here is a link to SWING TOP BOTTLES.


Back to Bella’s Vanilla Cake…
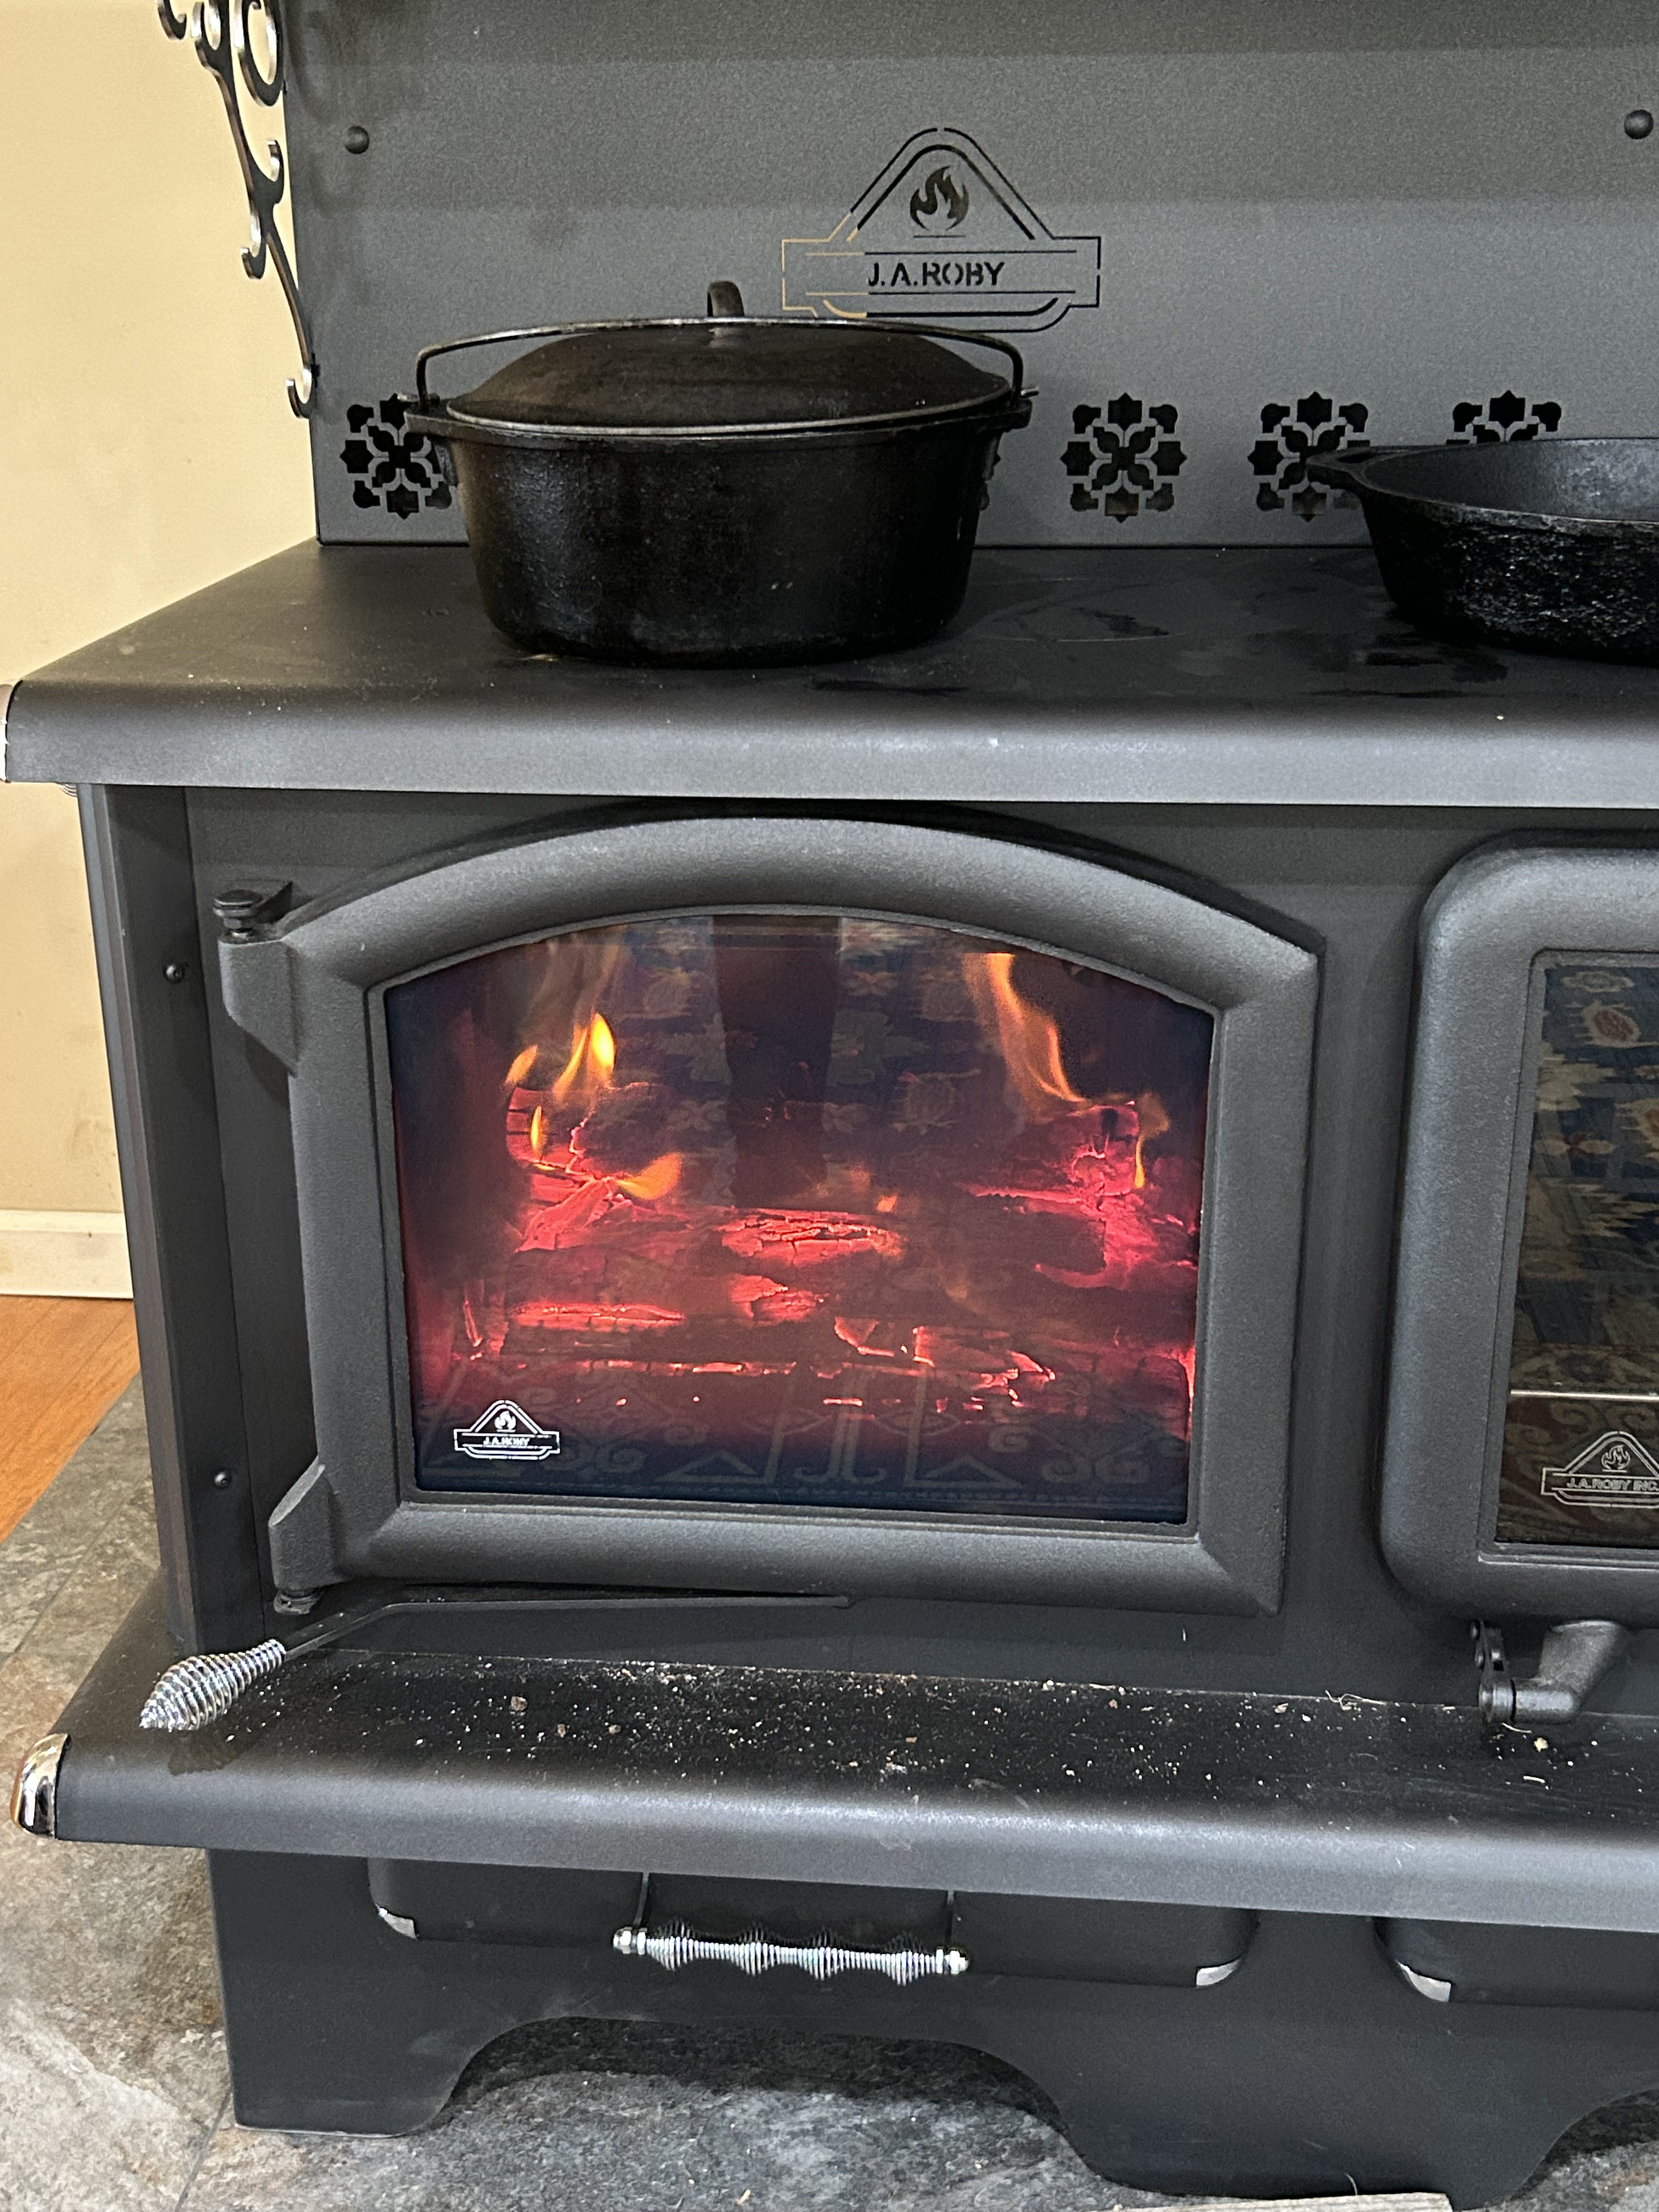
We are in that transition time between using the wood burning stove and baking in the outdoor kitchen. It is too hot here in Mississippi to crank up the heat in the wood cook stove, and too cool to be comfortable in the outdoor kitchen, so we decided to bake on my electric range today. Not as much fun, but it tastes just as good! Almost!
Nanny told me that she got this little book when she got married in 1919. It is one of the things that I treasure most. The recipes all have simple ingredients that I keep on hand, so there is no need to run to the grocery every time we want to bake.

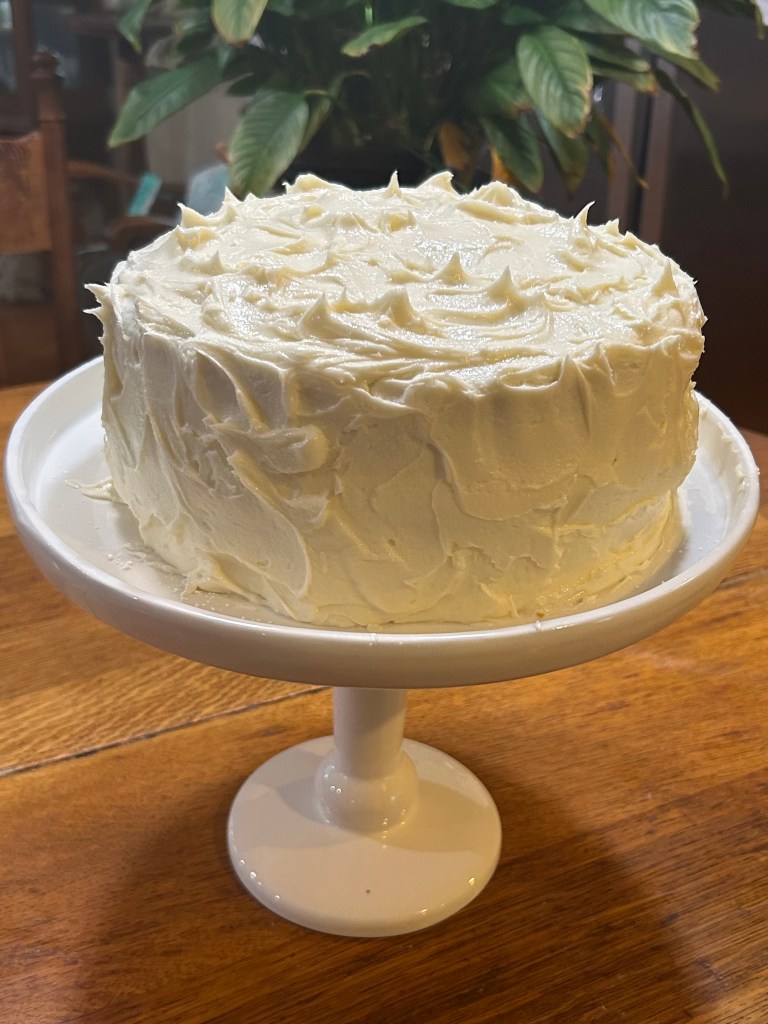
The recipe book calls this cake a White Supreme Cake. It is the go-to recipe that I use when I want to bake a vanilla cake. The crumb is so soft and delicious. Bella and I did make one change. We added an extra teaspoon of pure vanilla extract. We used 3 teaspoons of vanilla rather than 2. (You can substitute almond extract and have a totally different bake.)
TIP:
If you want a white, white cake, you will need to use Crisco and egg whites–no yolks. The yolks or butter will affect the color of the cake. It is also a good idea to use clear vanilla. We only had regular vanilla, so that’s what we used. Still came out pretty and white.
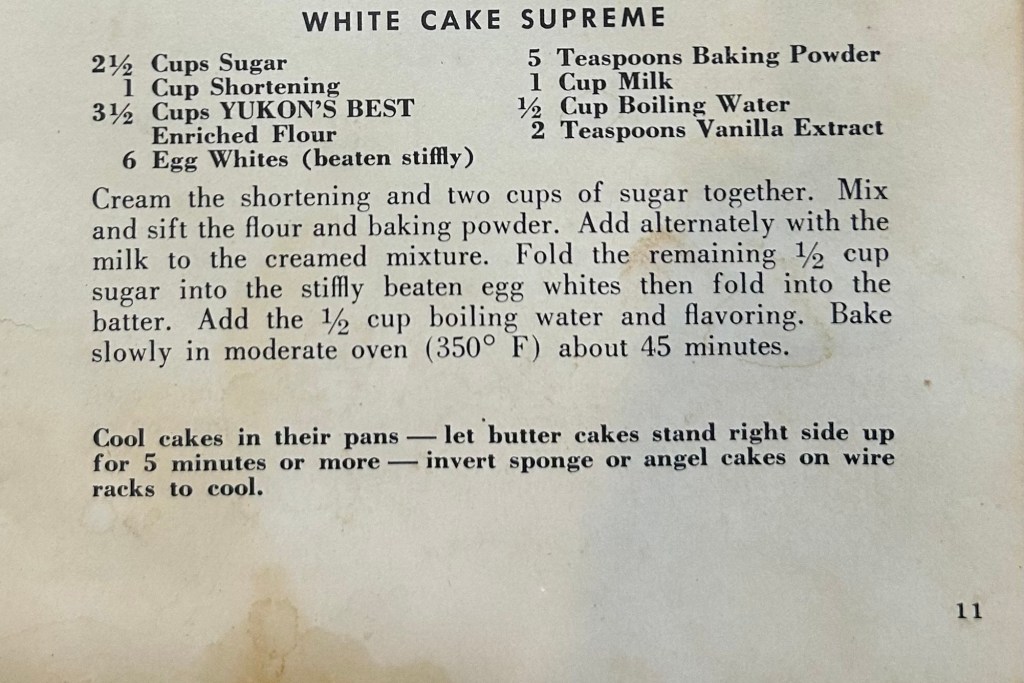
Very Vanilla Cake
2 1/2 C. sugar
1 C. Crisco
3 1/2 C. plain flour (We used Shawnee). The brand of flour will affect your bake!
6 egg whites (beaten stiffly)
5 t. baking powder
1 C. whole milk
1/2 C. boiling water
3 t. pure vanilla extract
METHOD
Step 1: MEASURE out all of the ingredients. PREHEAT oven to 350 degrees. GREASE and FLOUR 2 cake pans.
AFTER all ingredients are measured, go ahead and BEAT 6 egg whites.
Step 2: CREAM 2 C. of the sugar with 1 C. Crisco. You are saving out the remaining 1/2 C. sugar that the recipe calls for to add to the beaten egg whites.
Step 3: SIFT 3 1/2 C. plain flour with 5 t. baking powder and add alternately with 1 C. milk to the creamed sugar mixture.
Step 4: STIR the remaining 1/2 C sugar into the stiffly beaten egg whites.
Step 5: GENTLY FOLD the stiffly beaten egg whites into the cake batter.
Step 6: STIR in 1/2 C. boiling water and 3 t. vanilla extract.
Step 7: POUR batter evenly into 2 greased and floured cake pans. BAKE at 350 degrees for 35 minutes. The original recipe called for 45 minutes, but the cake was done in 35. You can test with a toothpick just to make sure. Insert toothpick into center of cake. If it comes out clean, the cake is done.
Step 8: COOL in pans for 5 minutes and then transfer to a wire rack to cool completely before frosting.
VANILLA CREAM FROSTING (almond)
3 sticks butter (softened)
3 t. pure vanilla extract
6 C. powdered sugar
3 T. milk
METHOD
Step 1: BEAT 3 sticks of softened butter in bowl of stand mixer for 3 minutes. (You can do this by hand.)
Step 2: ADD 6 C. powdered sugar, 3 t. vanilla, and 3 T. milk.
Step 3: MIX on medium speed for 3 more minutes. If you think the frosting is too thick, add more milk 1 t. at a time and continue to mix until you reach the desired consistency.
Step 4: SPREAD on cake that has completely cooled on a wire rack.
BELLA’S BAKE
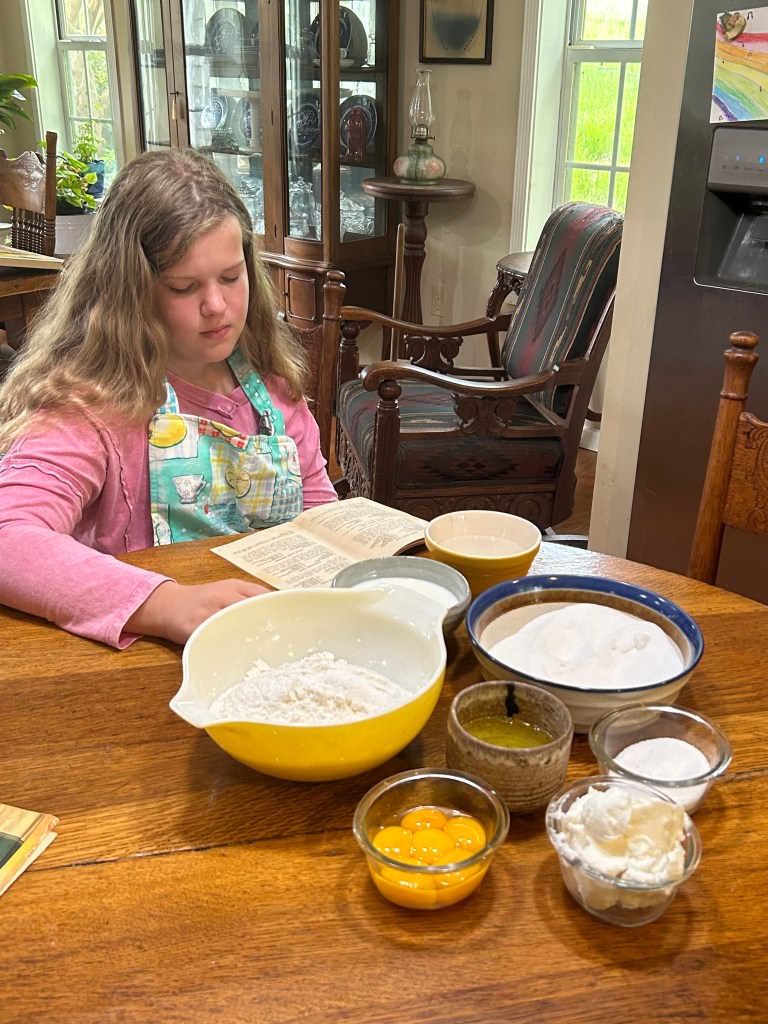
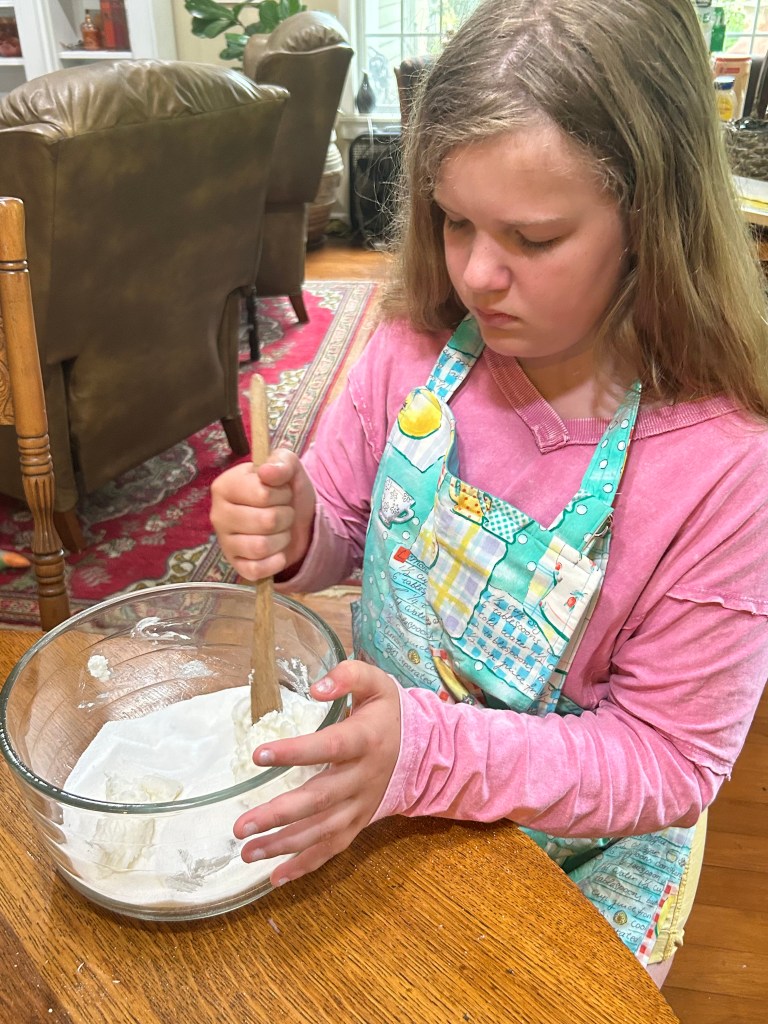
Step 1: Before we started to bake, Bella MEASURED out all of the ingredients. The egg yolks are pictured, but we only used the whites. PREHEAT oven to 350 degrees. GREASE and FLOUR 2 cake pans.
- 2 1/2 C. sugar
- 1 C. Crisco
- 3 1/2 C. plain flour (We used Shawnee). The brand of flour will affect your bake!
- 6 egg whites (beaten stiffly)
- 5 t. baking powder
- 1 C. whole milk
- 1/2 C. boiling water
- 3 t. pure vanilla extract
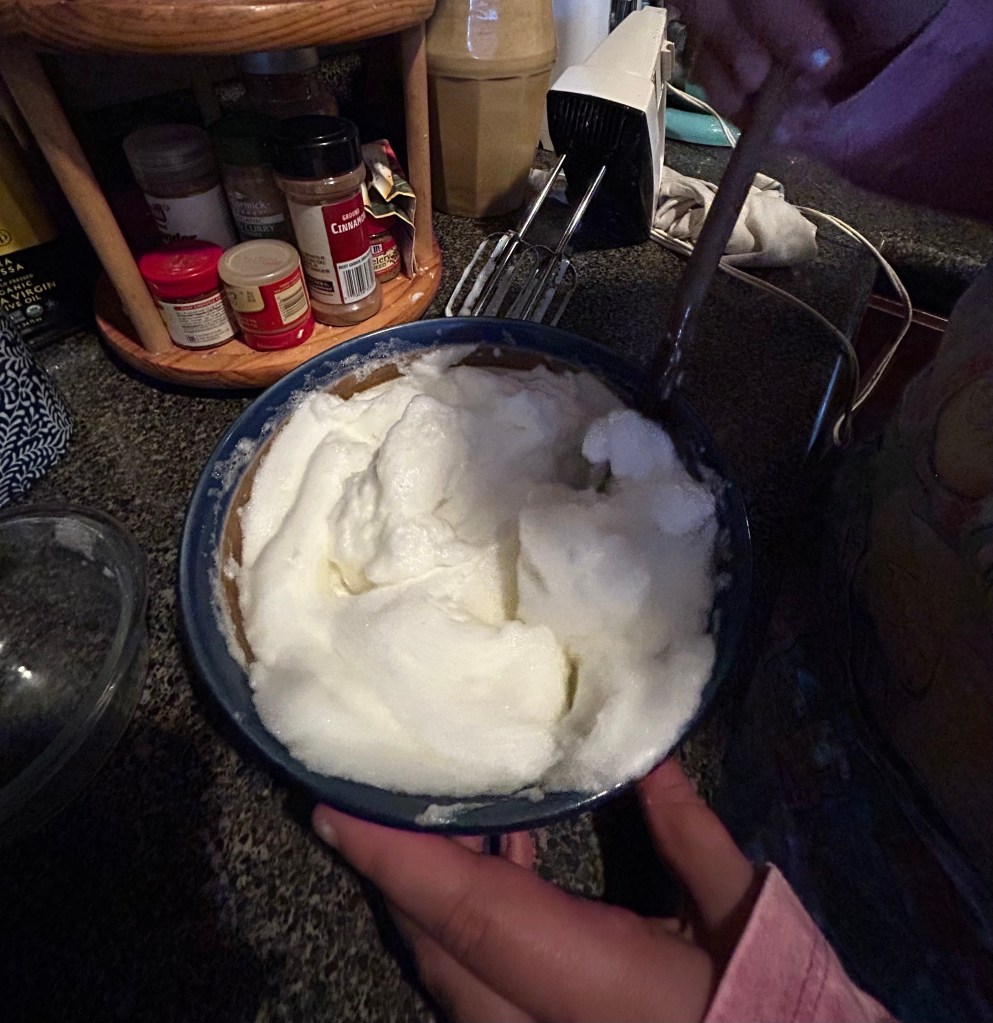
AFTER all ingredients are measured, go ahead and BEAT 6 egg whites.
TIP:
Be careful! If you get even a drop of the yellow in the whites, they will NOT make the stiff peaks that you need to incorporate air into your batter. We crack the eggs into a separate small bowl–and then add that white to our bowl containing the other whites. If you make a bad break and you are breaking directly into the bowl containing all of your whites, the whole batch will be ruined! Better to wash another small bowl! This goes for making pie meringue too!
Step 2: CREAM 2 C. of the sugar with 1 C. Crisco. You are saving out the remaining 1/2 C. sugar that the recipe calls for to add to the beaten egg whites.
Step 3: SIFT 3 1/2 C. plain flour with 5 t. baking powder and add alternately with 1 C. milk to the creamed sugar mixture.

Step 4: STIR the remaining 1/2 C sugar into the stiffly beaten egg whites.
Step 5: GENTLY FOLD the stiffly beaten egg whites into the cake batter.

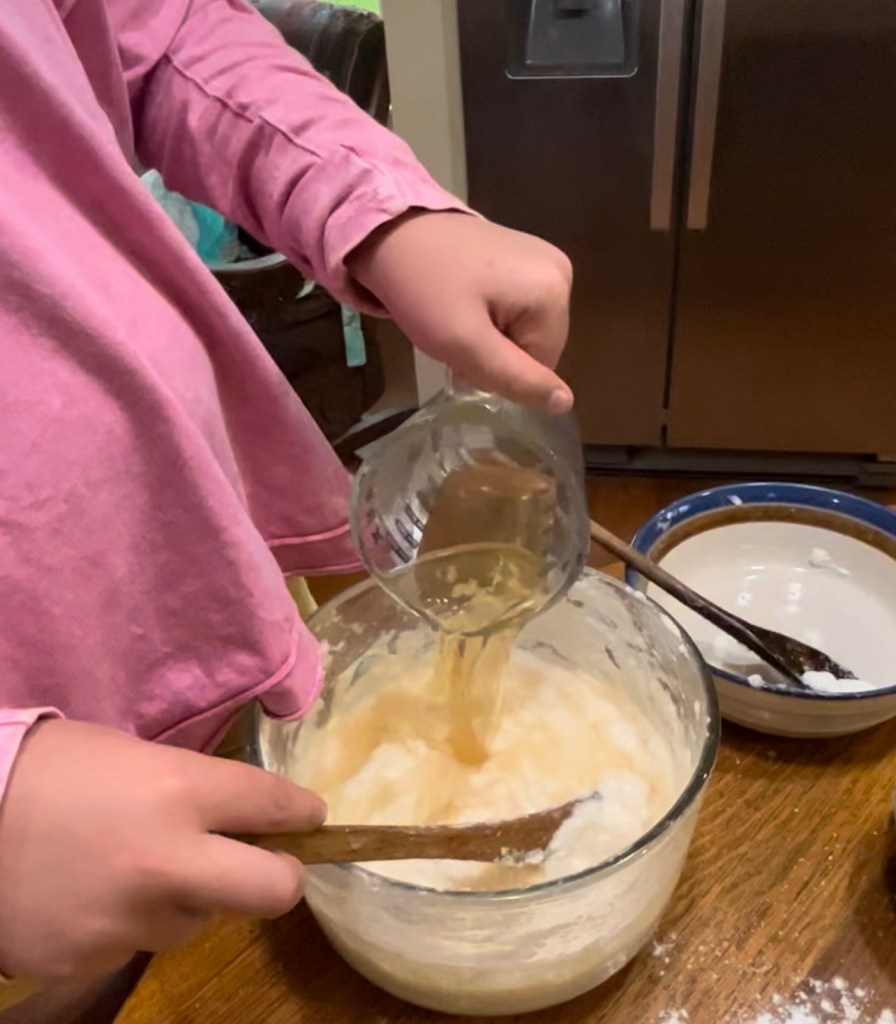
Step 6: STIR in 1/2 C. boiling water and 3 t. vanilla extract.
Tip:
Boil more water than you need because it will evaporate while boiling. Measure boiling water out of you pot.
Step 7: POUR batter evenly into 2 greased and floured cake pans. BAKE at 350 degrees for 35 minutes. The original recipe called for 45 minutes, but the cake was done in 35. You can test with a toothpick just to make sure. Insert toothpick into center of cake. If it comes out clean, the cake is done.
Step 8: COOL in pans for 5 minutes and then transfer to a wire rack to cool completely before frosting.

Vanilla Buttercream Frosting
- 3 sticks butter (softened)
- 3 t. pure vanilla extract
- 6 C. powdered sugar
- 3 T. milk
This recipe will make enough frosting to allow for the deep swirls that make cakes oh so pretty! And who doesn’t love a lot of deep, sweet frosting? To me, skimpy frosting ruins the best cake!
If you are making an almond cake, don’t forget to use almond flavoring in the frosting! Something I would do!
Method
Step 1: BEAT 3 sticks of softened butter in bowl of stand mixer for 3 minutes. (You can do this by hand.)
Step 2: ADD 6 C. powdered sugar, 3 t. vanilla, and 3 T. milk.
Step 3: MIX on medium speed for 3 more minutes. If you think the frosting is too thick, add more milk 1 t. at a time and continue to mix until you reach the desired consistency.
Step 4: SPREAD on cake that has completely cooled on a wire rack.

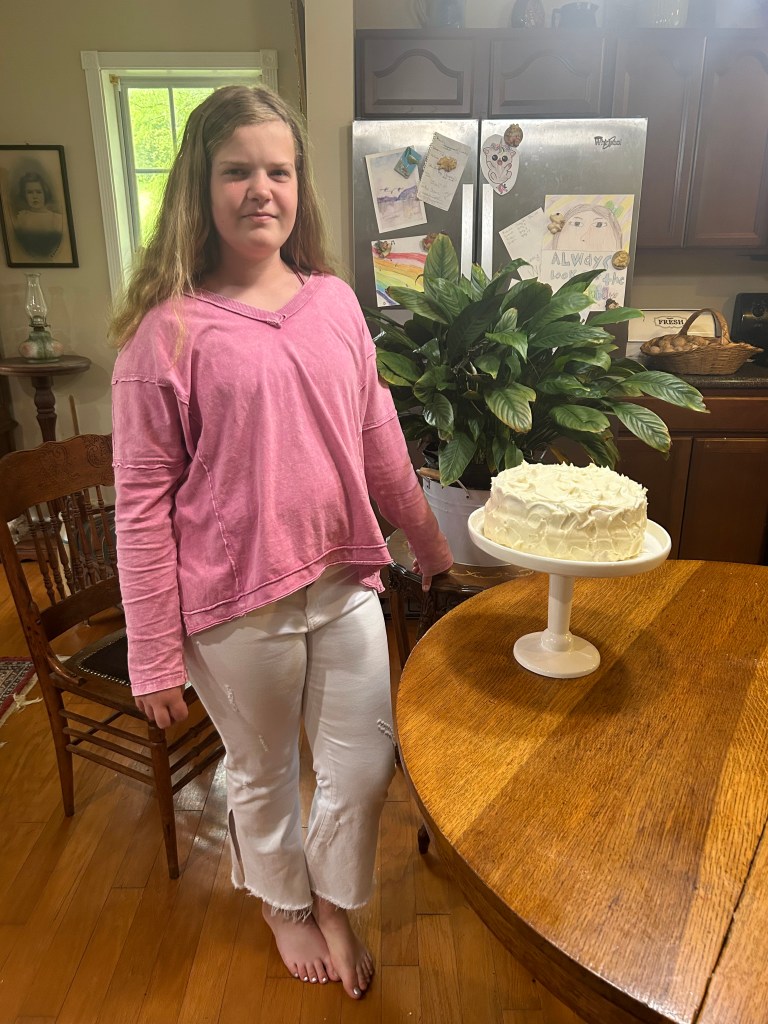
Dressed and ready for the party! (my barefooted little baker)
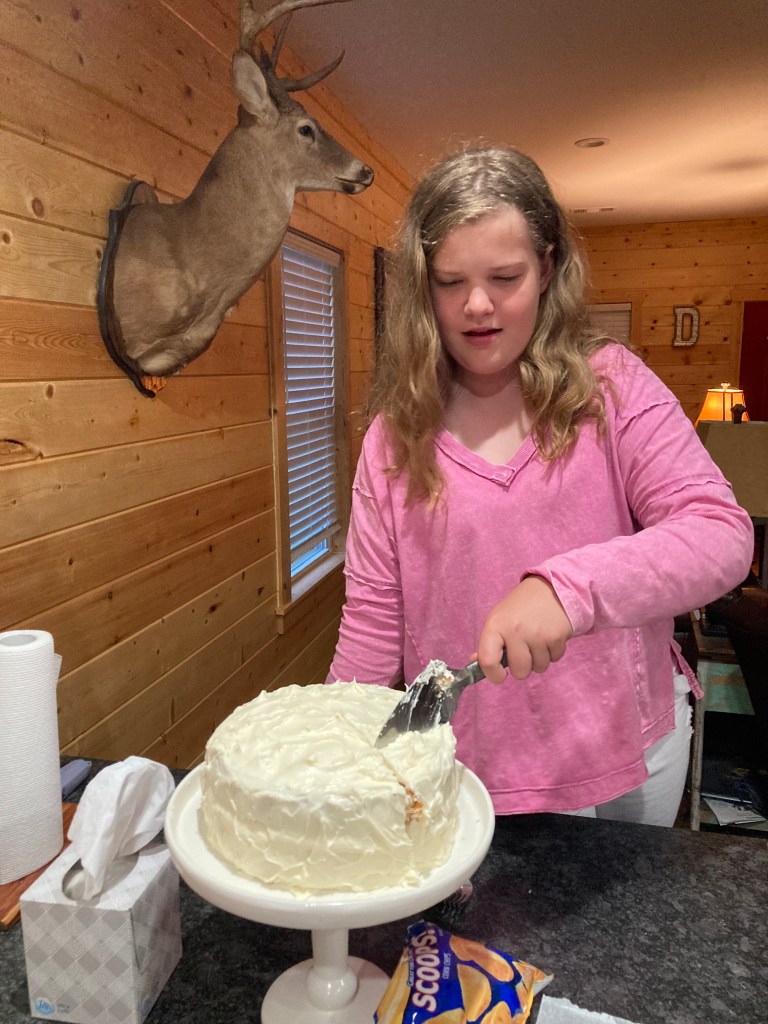
Birthday Party at Sarge’s House–cutting the cake!
This Week’s Timeless Treasure
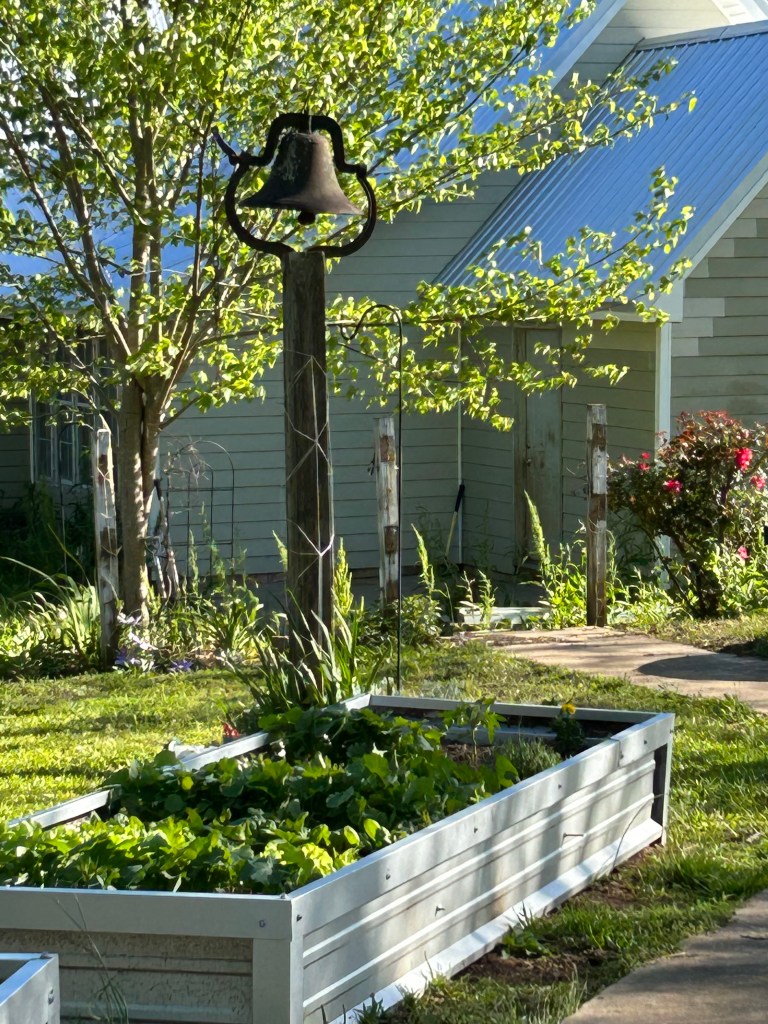
Growing up on the farm in the 1950’s and 60’s, I always begged my grandmother to ring a dinner bell for my grandfather to come in from the fields. At the time, we did NOT have a dinner bell, but Nanny did have an old cowbell.
One day, she finished dinner a little early (the noon meal for country people). She and I got the cowbell and hurried to the front yard. Dadoo knew that we were going to ring the bell that day, but apparently he had forgotten.
There was a huge weeping willow tree in the yard back then, and I saw him duck behind it. I never told him that I saw him. He never knew how disappointed I was that I did not get to call him to dinner with the “cowbell.”
Standing at Nanny’s side, I rang the bell loudly, and we rushed back into the house to set the table. He came in hot, dirty and tired a few minutes later. I never asked to ring the dinner bell again.
When I was a little older, Mama found this dinner bell and put it up at our house. Years later, when my husband retired from the Coast Guard and we moved home to the farm, Mama let me move the dinner bell to the back yard of the old farmhouse.
Bella loves to ring the dinner bell! It is a mile to the backside of the farm, and her Pappy can hear the bell and knows dinner is ready.
Visit us again at Cozy Kitchen Wood Stove for recipes and other tips for vintage cooking, gardening, and just good ole country living!
And don’t forget to scroll to the bottom of the page and SUBSCRIBE to our BLOG! We post recipes and tips weekly!

4 responses to “Bella’s Vanilla Cake–Vintage 100 year old recipe!”
The cake looks delicious and that old cookbook is a treasure. I loved the story of the cowbell dinner bell!
LikeLike
Glad you enjoyed the story!
LikeLiked by 1 person
A lovely cake! Well done.
LikeLike
Thanks!
LikeLiked by 1 person